Open Hive System with electronic (in the middle), humidity / temperature sensor for inside (left) and outside (right), at the top five temperature sensors for inside and bottom the scale unit.
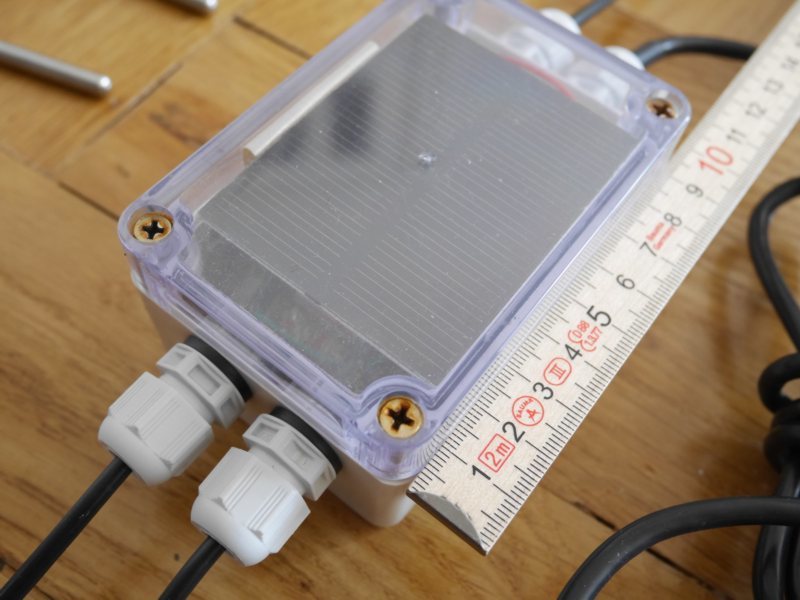
The waterproof enclosure after some weeks outside. Screws seems not to be stainless steel.
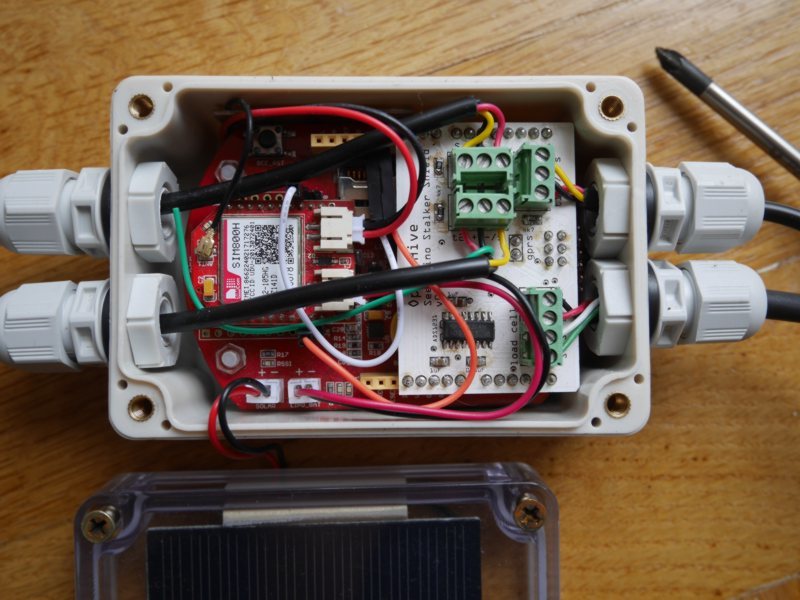
The open electronic box with LiPo battery (not visible, electronic main board (red, Seeeduino Stalker), the Open Hive shield (white), GSM module (left side), solar cell (bottom).
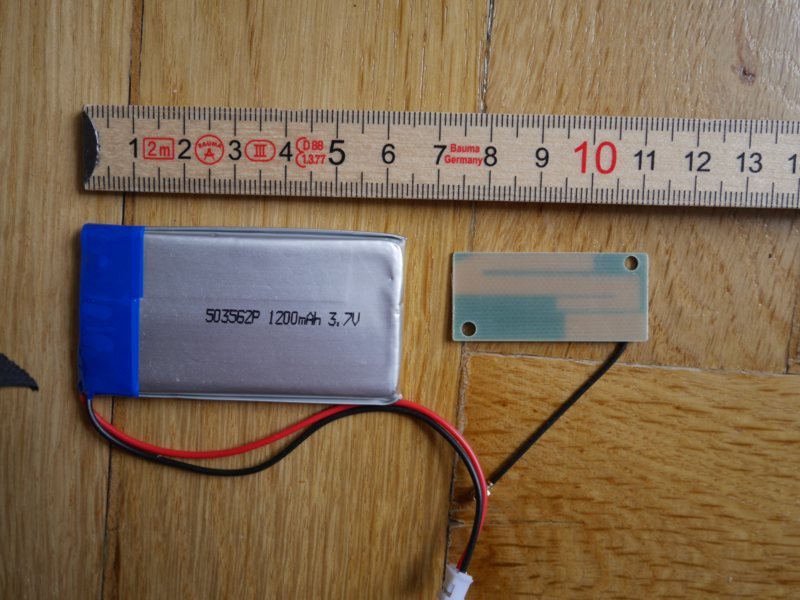
LiPo and GSM PCB antenna.
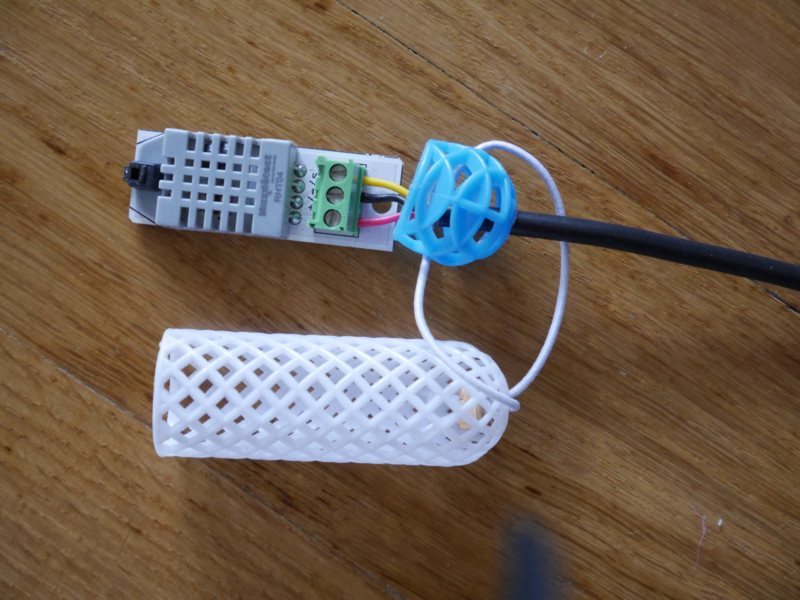
Protection for the inside combined humidity / temperature sensor is a simple hair roller, you are possibly using and knowing as (male) beekeeper for queen protection and part time cage while inspection.
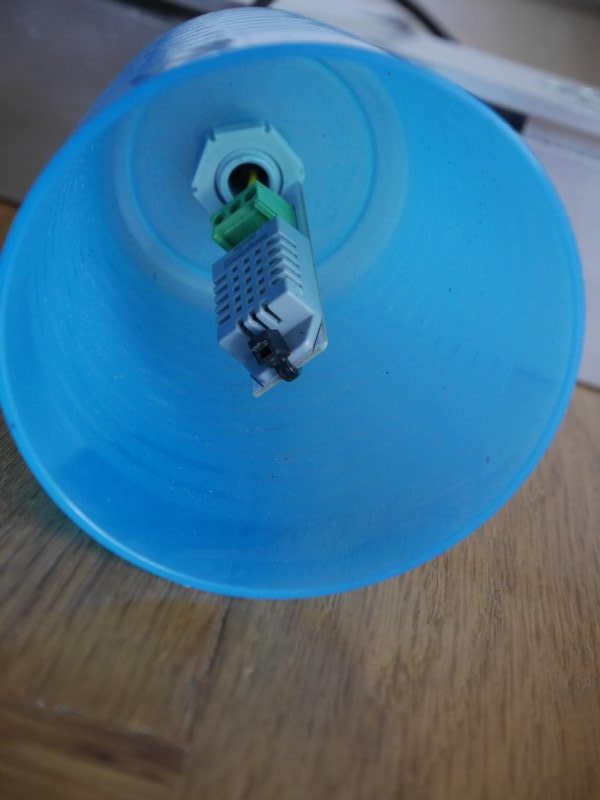
The outside counterpart: An also reused household article: Ikea cup with drilled hole for weather protection.
4 Likes
Hi
Hi Matt, we have not documented all steps yet. So find some starting points:
Single Side Scale Bar, “the scale” hardware
This is the low cost weight module of the Open Hive Scale. Due to the single side weighting only it is cheap but perhaps not as accurate as a scale that weights the whole hive.
2x aluminium angle profile, 50 x 50 x 5 x 340 / 450 / 500 (accordingly to your hive type)
2x small spacer plate, 35 x 33 x 5
8x screws, Allen key, countersunk head, M6 x 30
1x load cell, Bosche H30A (we used the 200 kg variant, but 100 kg will be sufficient also)
Drilling Templates
l-profil-50x50x5_v0.3b_340mm_bohrv…
Shield for Seeeduino Stalker
Box Assembling
[DSC_0105]
First thing: We have to do some documentation: The first Open Hive electronic boxes does not have a serial number only, but also a personalized user name!
[DSC_0106]
The real first assembly step is to reduce the diameter of the load cell’s shielding cable so that it fits in the screw terminal. Take a box cutter or wire cutter and divide the shielding cable and cut the second part down.
[DSC_0107]
Put the cable through the cable glances.
[DSC_0108]
S…
Temperature Array (sorry in German)
Prototyp 1 mit Flachbandkabel
Hi Thomas, ich habe zwei Typen des Temperatur-Arrays gebastelt, Einmal mit einem Flachbandkabel auf dem Bild rechts zu sehen mit:
DS18B20, habe die relativ teuren von www.komputer.de da sind die Metallhülsen mit dem Messfühler / eigentlichen DS18B20 vergossen und nicht wie in deinem Link mit Schrupfschlauch abgeschlossen. Denke für unsere Zwecke reichen die günstigen aber auch.
6-adriges Flachbandkabel, Meist bekommt man gut 10-adriges und zieht dann einfach vier …
Not structured, but a bit product / parts dropping in
Die ersten Zutaten sind von Sodaq angekommen:
1200 mAh LiPos mit JST-Stecker
0,5 W Solarzelle
GPRSBees
LiPo und Solarzelle gibt es als Bundle auch günstiger - das zusätzlichen Micro-USB-Kabel kann man dann schön mit dem Adafruit Micro Lipo charger verwenden, ist günstiger als ein FTDI-Kabel (wenn man es nur zum laden über den Stalker verwenden würde). Das ist als backup für die Imker gedacht, die nicht selbst programmieren wollen/können aber doch mal die Waage über Winter im Lager “vergessen…
Nice observation by @weef about the power consumption with a 1 h measurement and data upload intervall:
Unterschlage solche kleinen Beträge nicht, das sind immerhin 40 mA - das auch noch über eine Zeit lang kann völlig ausreichen (bei einem entsprechend dimensioniertem System):
das hier ist der Ladezustand des Systems von @peterthiemer , das bei stündlicher Übertragung seit (heute 2.2. exakt) zwei Jahren durchgängig ohne Ausfall läuft - mit einem Seeed Stalker, SIM800 (also GSM-2G-Datenübertragung) und einer 0,5W -Solarzelle ! Wie man sieht, geht selbst im Winter die LiPO-Spannung nicht unter 3,…

