Introduction
The general idea about this setup is to use the LinkIt Smart 7688 Duo as WiFi gateway for the RFM95 radio on the hardware layer and as UART-to-MQTT gateway on the transport layer. Since the 7688 is capable of running LEDE/OpenWrt and Python, BERadio should work out of the box.
The Duo comes with the ATmega32U4 as a realtime processor for the radio. LEDE has AVRDude on board so it can flash the ATmega with .hex files. This is the corresponding boards.txt.
Hardware Setup
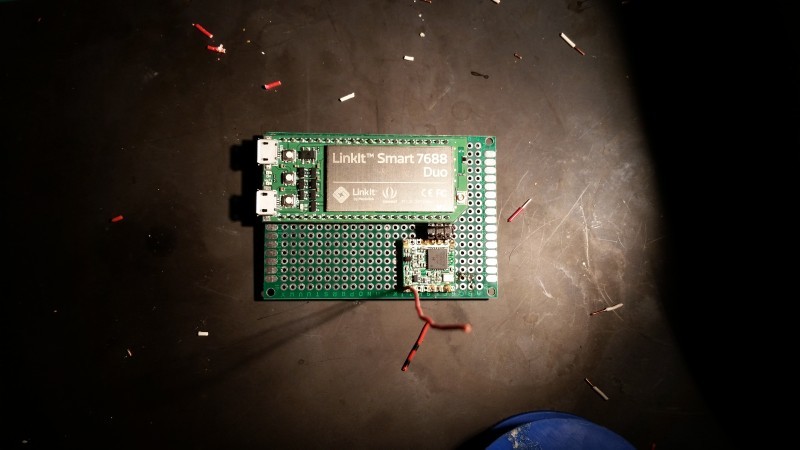
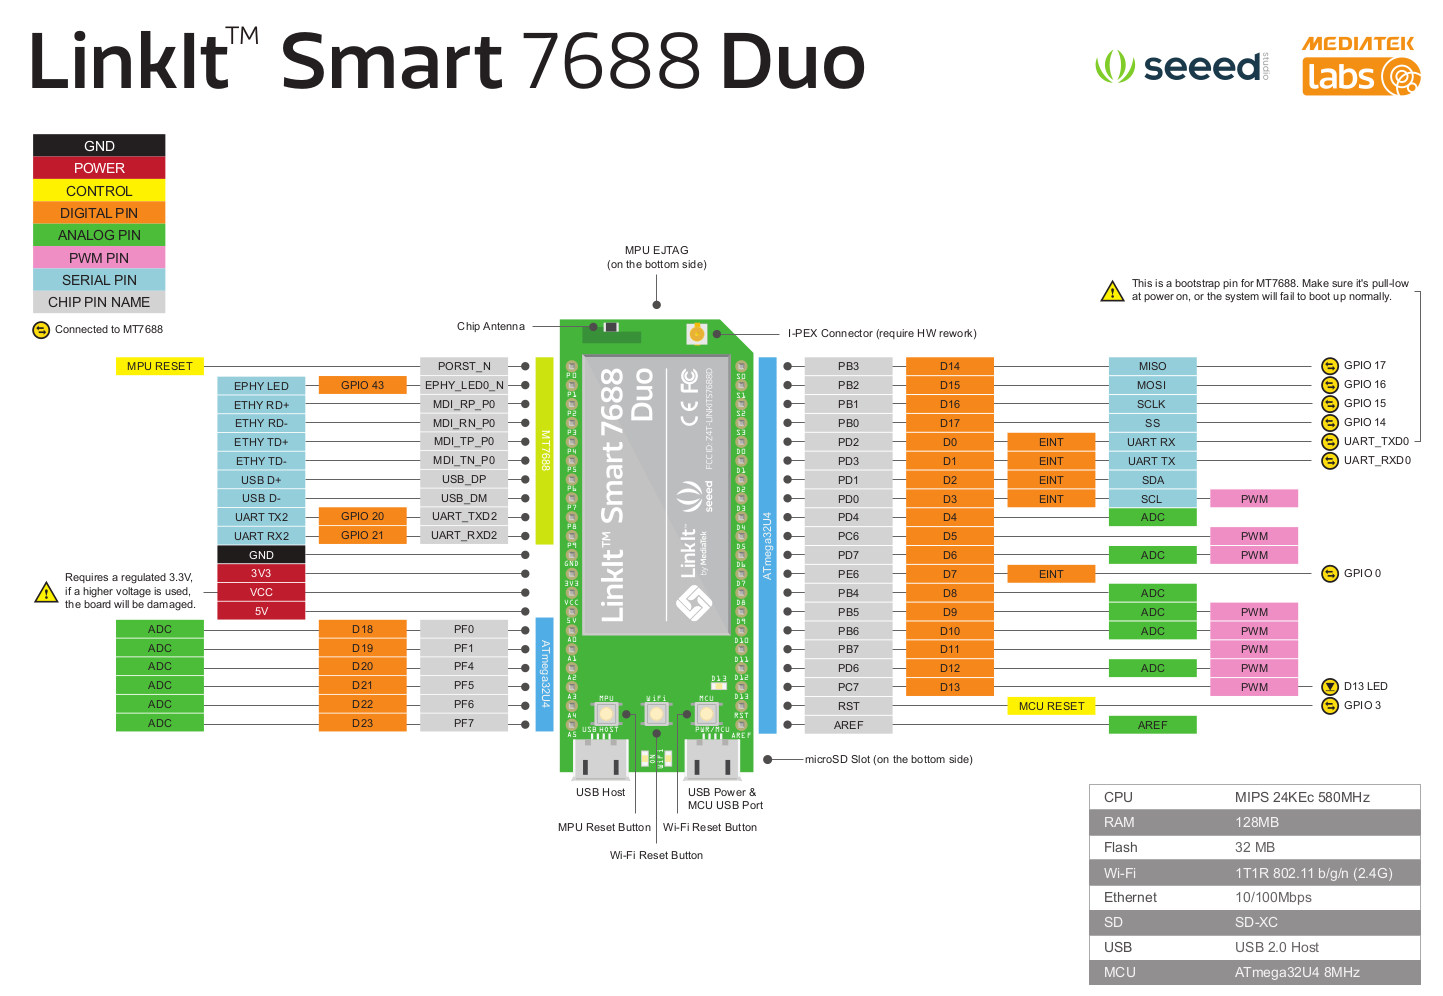
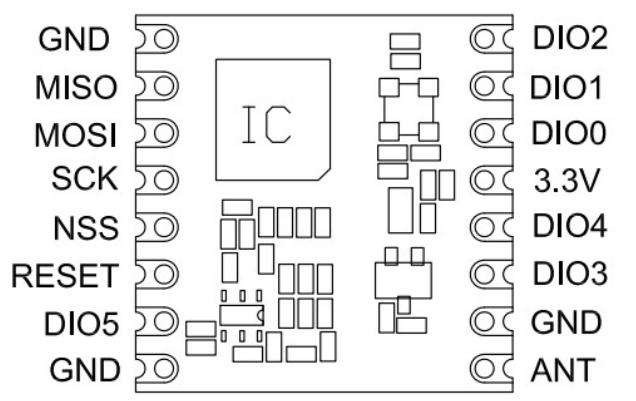
Pinouts
Antenna Length:
- 868.35 MHz 8.64 cm / 3.40 inch
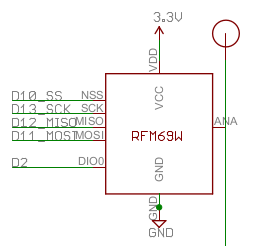
Wiring
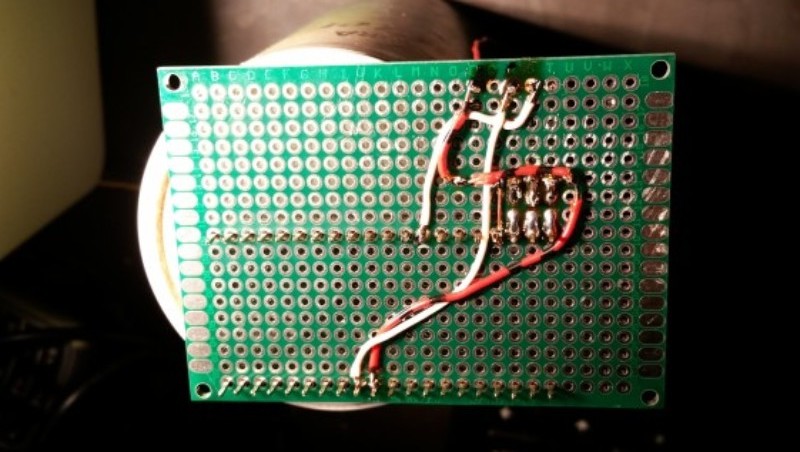
| **7688**  	    | **RFM95W** 	| **ATmega32U4** 	|
|---------------|---------------|-------------------|
| S0 / MISO 	| MISO       	| D14            	|
| S1 / MOSI  	| MOSI       	| D15            	|
| S2 / SCLK 	| SCK        	| D16            	|
| D17           | NSS        	| D17            	|
| D3      	    | DIO0          | D3             	|
| 3V3       	| 3.3V       	|                	|
| GND       	| GND        	|                	|
| GND       	| GND        	|                	|
| GND       	| GND        	|                	|
|           	| ANA        	|                	|
Software Setup
Introduction
Commands:
# Get serial console of MCU from within the 7688
$ picocom /dev/ttyS0 -b 57600
# Flash the MCU
$ root@mylinkit:/tmp$ avrdude -p m32u4 -c linuxgpio -v -e -U flash:w:generic.hex
I added this to my board txt
# avrdude boards.txt
smart7688.name=LinkIt Smart 7688 Duo
smart7688.upload.via_ssh=true
smart7688.vid.0=0x0E8D
smart7688.pid.0=0xAB00
smart7688.vid.1=0x0E8D
smart7688.pid.1=0xAB01

smart7688.upload.tool=avrdude
smart7688.upload.protocol=avr109
smart7688.upload.maximum_size=28672
smart7688.upload.speed=57600
smart7688.upload.disable_flushing=true
smart7688.upload.use_1200bps_touch=true
smart7688.upload.wait_for_upload_port=true

smart7688.bootloader.tool=avrdude
smart7688.bootloader.low_fuses=0xff
smart7688.bootloader.high_fuses=0xd8
smart7688.bootloader.extended_fuses=0xce
smart7688.bootloader.file=caterina/Caterina-smart7688.hex
smart7688.bootloader.unlock_bits=0x3F
smart7688.bootloader.lock_bits=0x2F

smart7688.build.board=AVR_LINKITSMART7688
smart7688.build.mcu=atmega32u4
smart7688.build.f_cpu=8000000L
smart7688.build.vid=0x0E8D
smart7688.build.pid=0xAB01
smart7688.build.usb_product="LinkIt Smart 7688 Duo"
smart7688.build.usb_manufacturer="MediaTek Labs"
smart7688.build.variant=smart7688
smart7688.build.extra_flags={build.usb_flags}
To make smart7688.build.variant=smart7688 work we need to provide the pins_arduino.h file for this target and place it in the $ARDUINO_CORE_PATH/hardware/arduino/avr/variants/smart7688 folder. /usr/share/arduino/hardware/archlinux-arduino/avr/variants/smart7688 in my case Archlinux and make it readable (775) for everyone.
-
/etc/avrdude.confneed some pins to be set here for board > v2:
You can get your board revision by running:
$ REV="$(dd bs=1 skip=1043 count=1 if=/dev/mtd2 2> /dev/null)" && echo $REV
# see: https://github.com/MediaTek-Labs/linkit-smart-7688-feed/blob/master/mtk-linkit/files/etc/uci-defaults/50_linkit_avrdude
# $ dd bs=1 skip=1043 count=1 if=/dev/mtd2 2> /dev/null
programmer
  id    = "linuxgpio";
  desc  = "Use the Linux sysfs interface to bitbang GPIO lines";
  type  = "linuxgpio";
  reset = 3;
  sck   = 15;
  mosi  = 16;
  miso  = 17;
;
Make sure, that the SPI pins are free for flashing
If you take the next step after wiring on a breadboard, you should consider jumpers between the radios SPI (MISO, MOSI, SCK) and the SPI of the LinkIt. Otherwise the firmware is flashed forever. And you should definitely consider soldering, since it was the only possibility for me to get stable radio receiving.
$ scp bin/generic/smart7688/generic.hex root@he_gateway.lan:/tmp/
$ ssh root@he_gateway.lan

$ cd /tmp
$ avrdude -p m32u4 -c linuxgpio -v -e -U flash:w:generic.hex
$ opkg update && opkg install picocom
$ picocom -b 115200 /dev/ttyS0
You might not getting any output here, which is because the default serial port in the AVR is mapped to Serial1. If you don’t want replace Serial.print() with Serial1.print() you can use the much more ugly but conventional SERIAL_PORT_HARDWARE directive, see: pins_arduino.h. (SERIAL_PORT_HARDWARE.print() …).
Links
Please enjoy this further reading material.