For a first LoRaWAN-Test I used the Adafruit Feather M0 with RFM95 LoRa as Hardware to send test data to The Things Network.
There are some tutorials out for the Feather LoRa. Be aware that you get this device in two flavors: The “32u4” with an ATmega32u4 as processor and the “MO” with ATSAMD21G18 ARM Cortex M0.
For memory reasons and for the option recording sound via the I2S interface I would recommend the M0!
Available Tutorials
The two main discussion threads I got useful information to get the Feather M0 LoRa and TTN running are linked below. In this treads you can find general information and more or less reliable pin definitions. ;-)
- Adafruit LoRa Feather -> Gateway and
- LMiC on Adafruit Lora Feather successfully sends message to TTN and then halts with “Packet queued”
A more structured tutorial for the Feather M0 is
Unfortunately the most interesting and inconsistent reported code section about the pin definition is not given in this tutorial. So I will document this in the next section.
Nevertheless I would recommend this tutorial for get it up and running.
Library
Arduino-LMIC library from Matthijs Kooijman
You have to make some changes in the default library for our use case, for details see the linked tutorial.
Pin Definition
To check the “by default” physically connected pins on the Feather see the Adafruit documentation page .
- [Arduino pin] #8 - used as the radio CS (chip select) pin
- #3 - used as the radio GPIO0 / IRQ (interrupt request) pin.
- #4 - used as the radio Reset pin
In the discussion threads are different opinions if GPIO1 and GPIO2 is needed also RST is discussed as optional for the library.
This is my pin definition for the M0, (other pins for the 32u4 version needed!)
const lmic_pinmap lmic_pins = {
    .nss = 8,
    .rxtx = LMIC_UNUSED_PIN,
    .rst = 4,
    .dio = {3,6,11},
};
Some Hints
Handling the Serial interface is a bit tricky on the Feather M0. Most confusion come from the fact that the Feather operates on two Serial ports. On my (Windows) system the Feather identifies on different ports for uploading and for serial outpu for debugging. After knowing this is is much easier to interface with the board.
For uploading you should doubleclick the reset button on the Feather to "switch to the right Serial. After uploading you have to choose the other Serial.
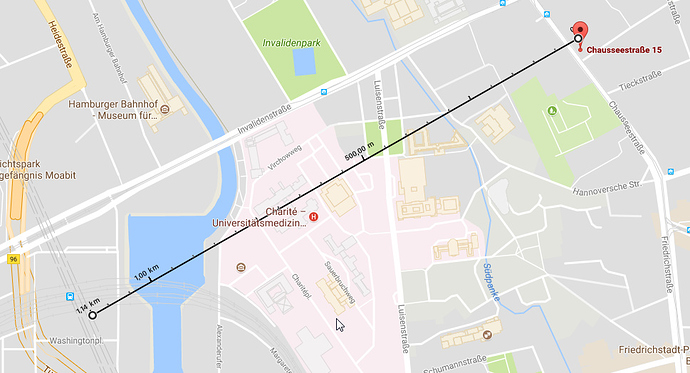
Range: 1 km
You can check the used gateway - after a successful upload - in the TTN console. My node connected over a range of 1 km to the Deutsche Bahn TTN Gateway on the Hauptbahnhof Berlin.
