Discovered by @Frank: a waterproof box with flange and two cable feedthroughs and clear top:
IP66 und groß, 125mm x 175mm x 75mm, interior Height: 70mm
1 Like
Bisher habe ich wasserdichte Elektronikboxen bei ebay bestellt.
Inspiriert vom Feinstaubsensor bei luftdaten.info habe ich mich heute auf die Suche bei Bauhaus gemacht, um zu schauen, ob man aus Abwasserrohren sowas ähnliches auch fürs Bienen monitoren basteln kann.
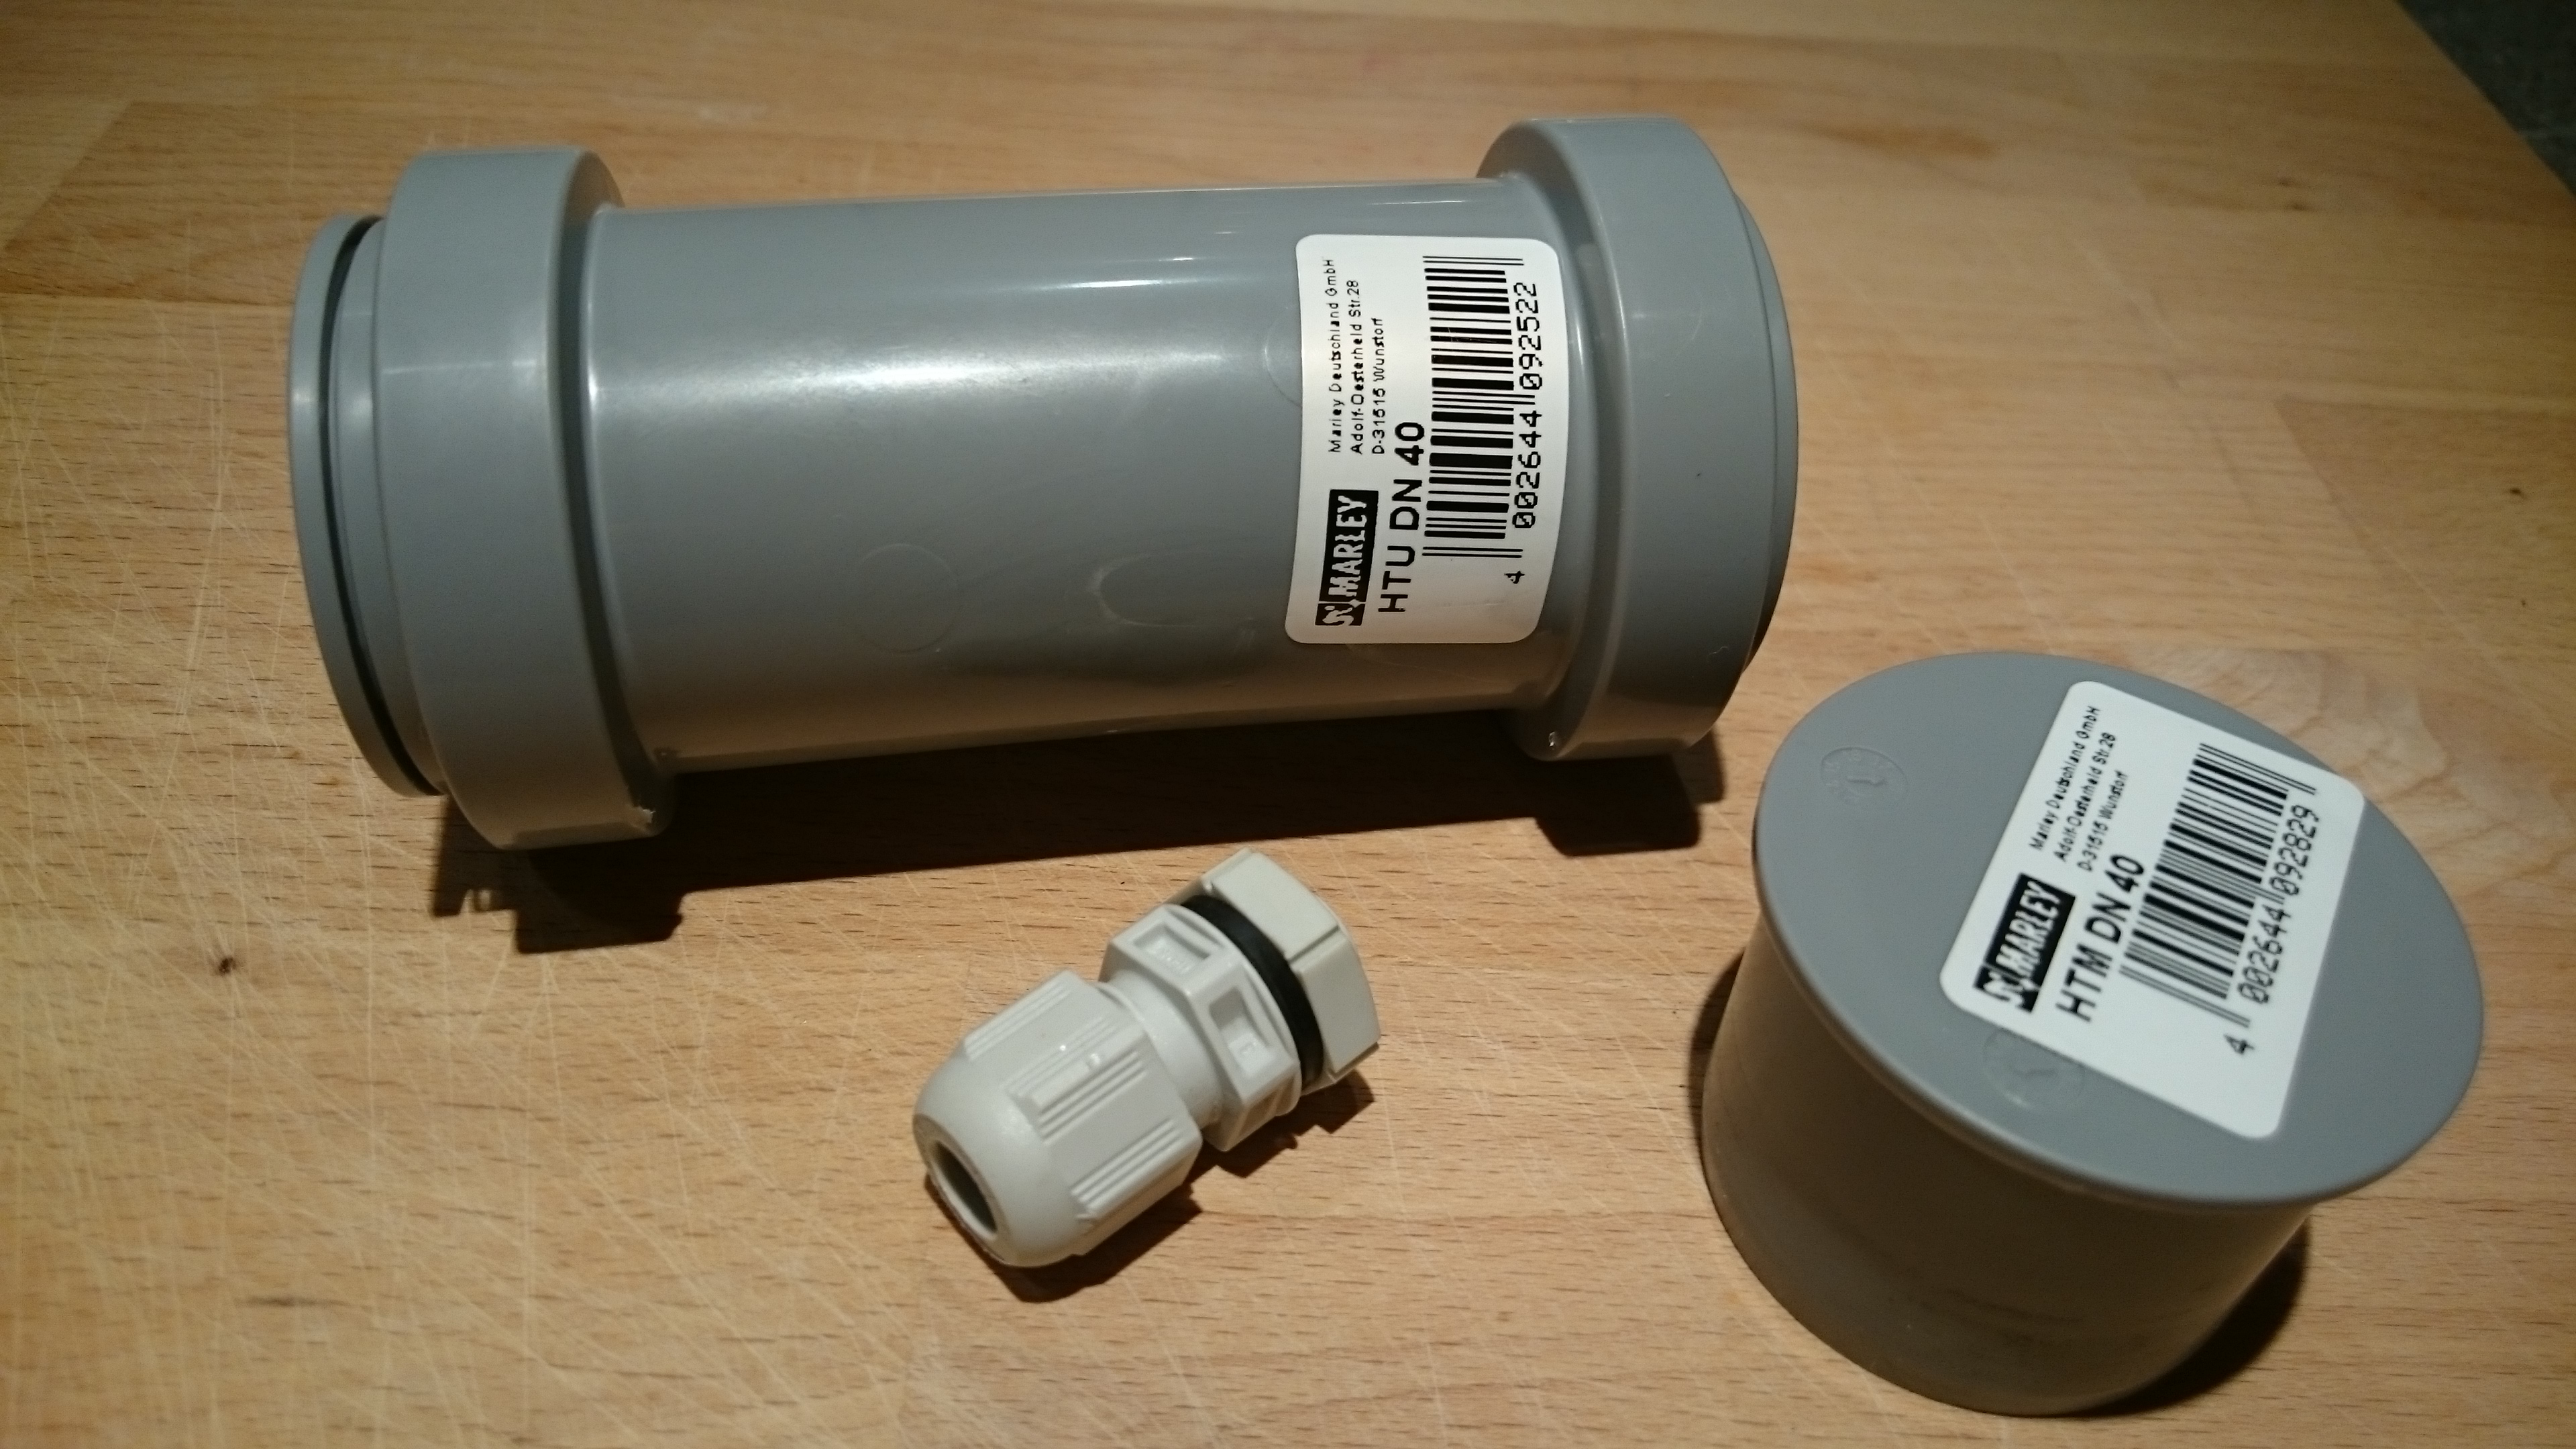
- HT-Überschiebmuffe DN 40
- 2x HT-Muffenstopfen DN 40
- die Kabelverschraubung ist nicht vom Baumarkt, sondern von Wiska, 10066524, ESKV-SET 12 gibt es auch doppelt so teuer bei Conrad, aber auch in einer Kleinpackung bei Conrad (natürlich auch super teuer ; - )
DN 40 geht gerade so, vielleicht 50 oder größer das nächste mal versuchen. Die Kabeldurchführungen müssen ja auch noch …
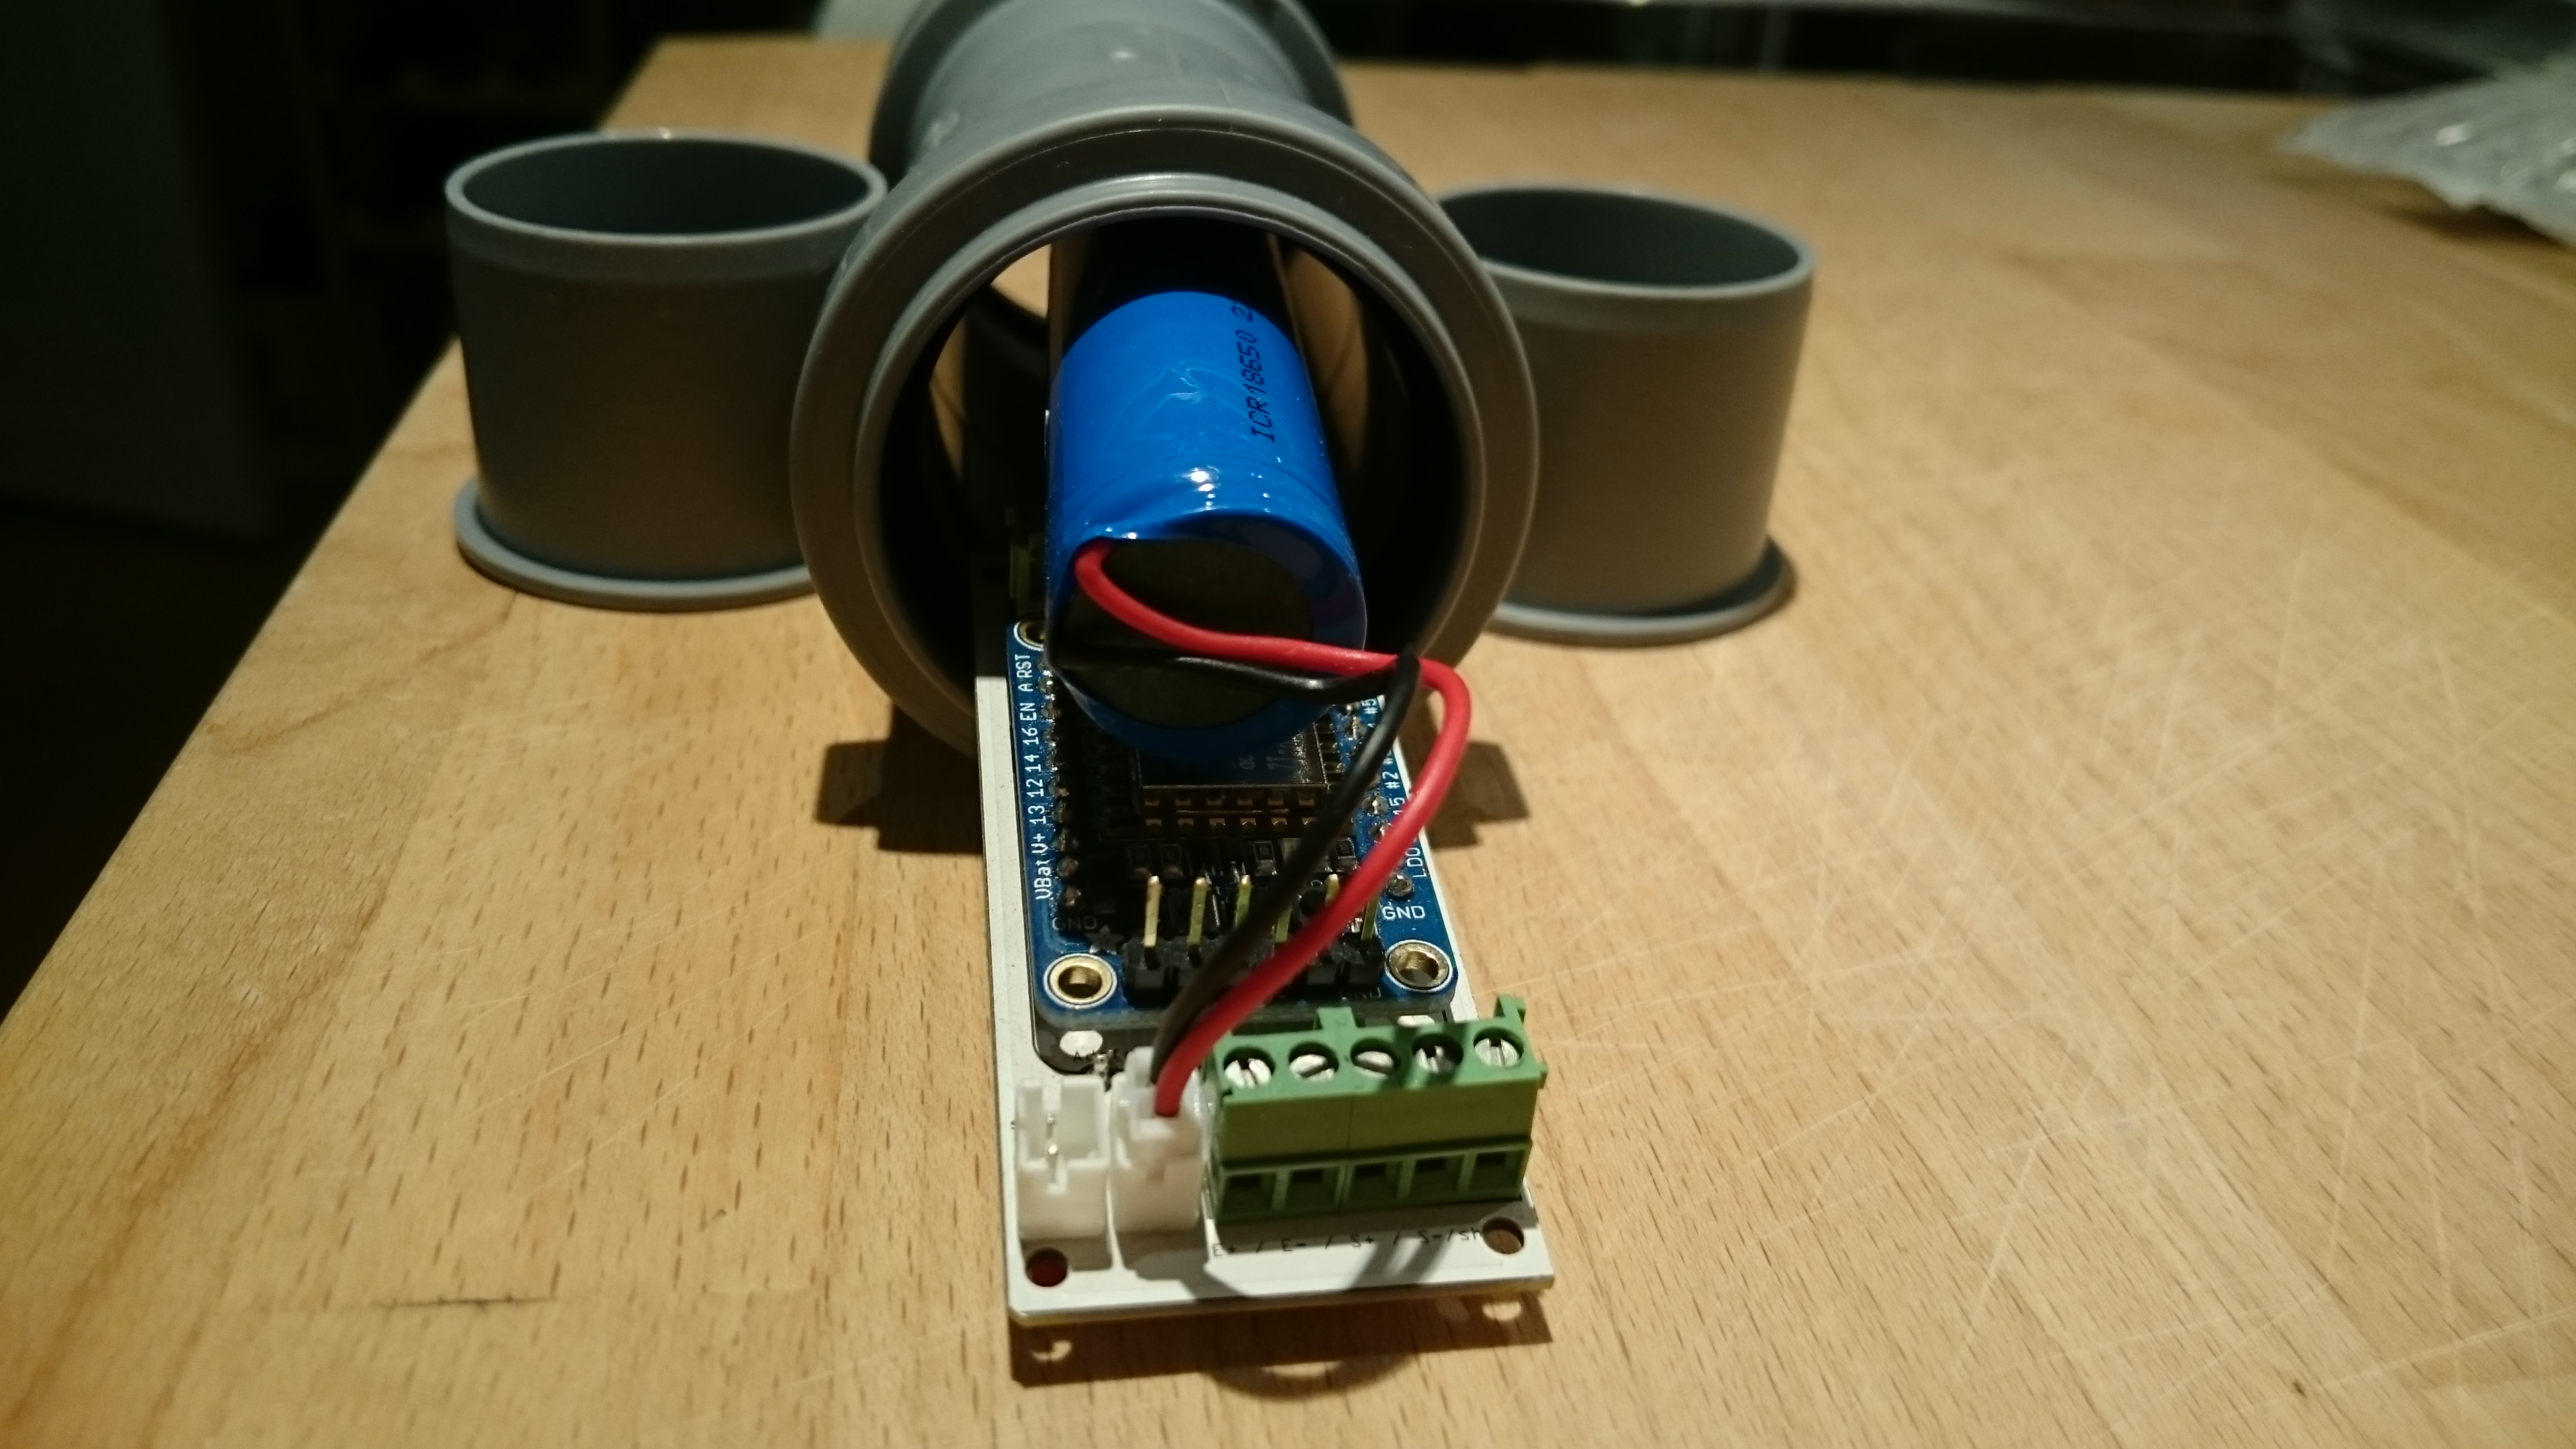
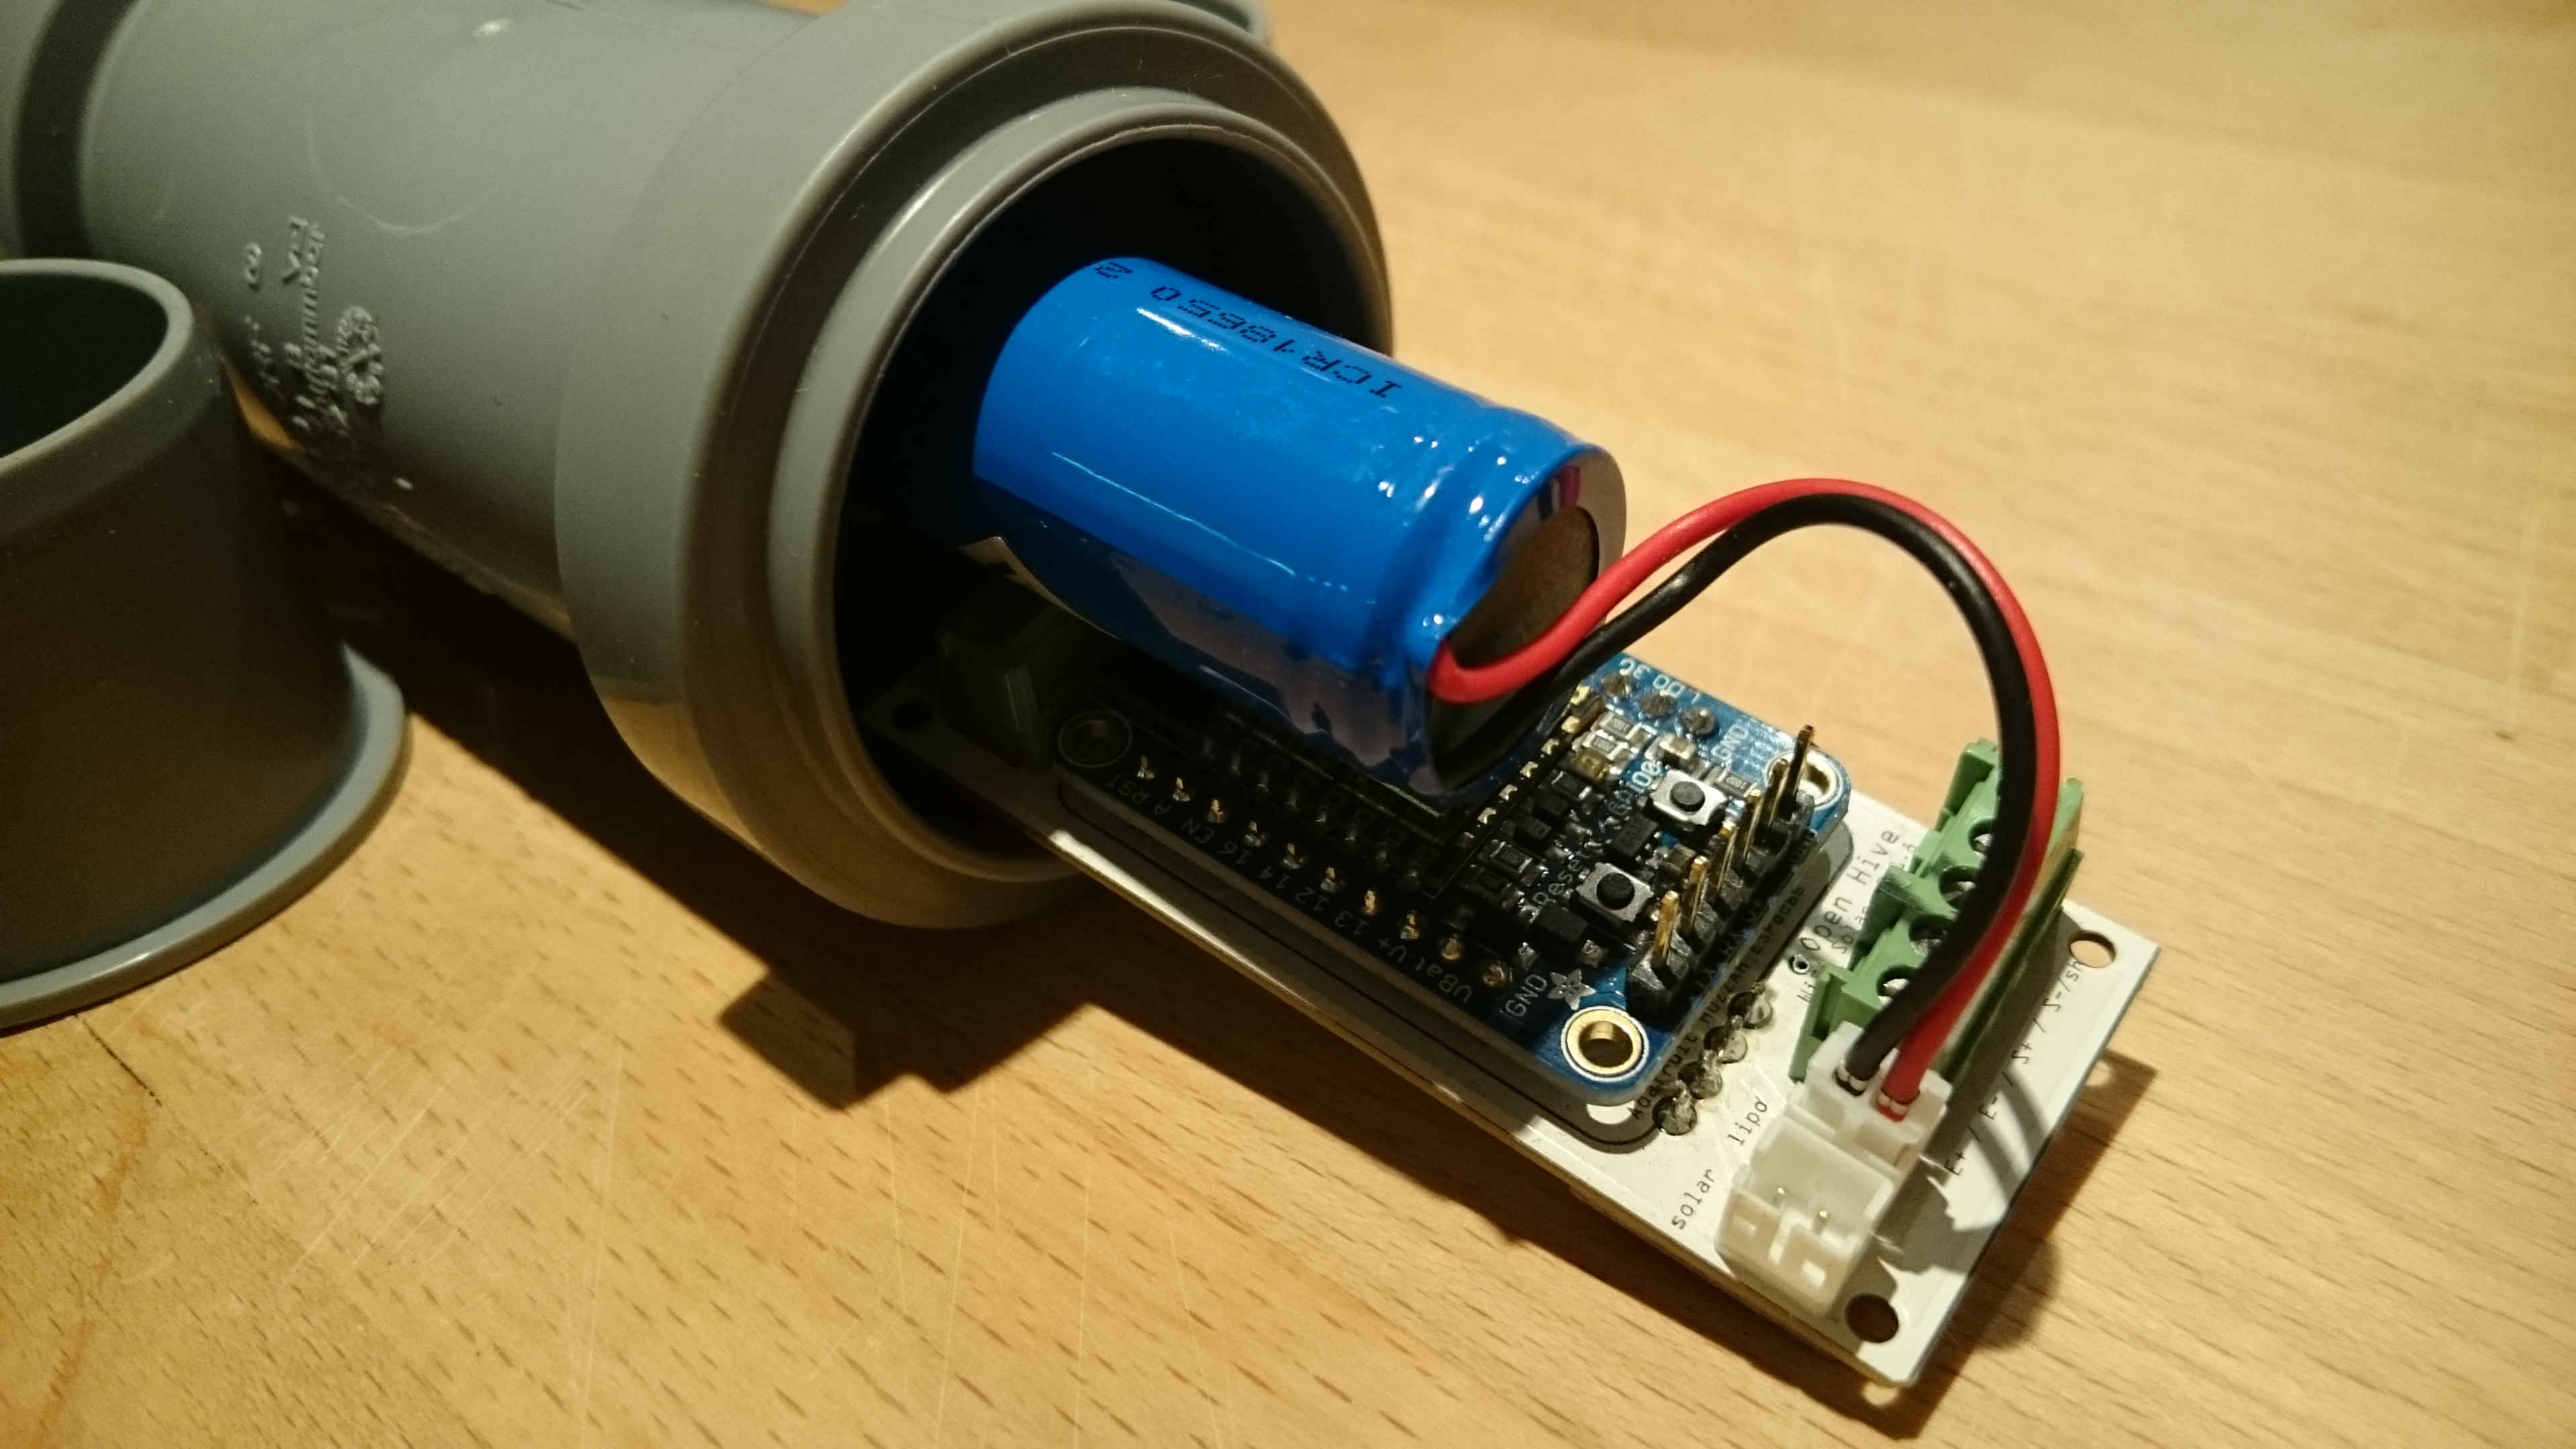
… hmm, der Innendurchmesser der DN 40-Stopfen reicht leider nicht für zwei Kabeldurchführungen.

D.h. man kann an die DN 40-Version nur zwei Sensoren (z.B. Waage und Kombisensor Außentemperatur und -feuchte) anschließen.
Für mehr braucht es dann DN 50 und größer.
3 Likes
Das gefällt mir sehr gut!
1 Like
Habe gerade im Baumarkt eine schöne Verteilerdose von Kopp gefunden, ausreichend groß auch für noch einen SDS011, verschraubter Deckel, 3 verschraubte Kabeldurchführungen liegen bei - das ganze unter 5 €. EAN müsste ich bei Bedarf mal nachschauen.
Beim letzten Treffen hatte @wtf ein etwas größeres IP6x-Gehäuse von Spelsberg dabei. Ich glaube es war das IP66-klassifizierte TK PC 1309-6-tm mit folgenden Eckdaten:
Leergehäuse, Industrie Qualität, Kasten/Deckel grau: glasfaserverstärktes Polycarbonat, ähnlich RAL 7035, Deckel transparent: Polycarbonat
Das könnte ganz nett sein, um z.B. für BOB einen BeagleBone plus ESP, ggf. auch mit einem kleinen Akku aufzunehmen. Spelsberg bietet auch die Konfektionierung der Gehäuse an (ab welcher Anzahl habe ich nicht gefragt ;-), z.B. die Bohrung von Löchern für Kabeldurchführungen!
Uijui-jui! Das harte ABS aber auch! Also das geht mit nem einfachen Akkuschrauber auch sehr gut. Denn halt Kabelverschraubungen – oder nen Blick zum Hersteller Neutrik, die auch Strom-, Netzwerk- und USB-Steckverbindungen in mehr-oder-weniger wasserdicht bauen. Ja, des geht dann ins Geld – führt aber zu recht simpel herstellbaren bzw gut reproduzierbaren Produkten.
;-) Ich denke jetzt an BOB, da haben wir vielleicht 200 Völker, je Box 4 bis 6 Löcher, sind 800 Löcher und mehr, die möchte ich nicht alle selbst bohren, auch nicht in ABS und einen 12er Bohrer hat man auch nicht einfach so im Haus, hab ich schon gesagt, dass ich seit einiger Zeit ein großer Fan von Stufenbohrern bin! Hab meine ersten Löcher auch mit normalen HSS gebohrt und Akkuschrauber!
Neutrik schau ich mir mal an, Danke für den Tipp!
1 Like
Some resources from the Smart Citizen Kit community.
Problems in autumn
It’s getting wet in Europe, so some kits in the wild like Smart Citizen Kit 2.1 and Smart Citizen Station are struggling.
Outlook
The repository at GitHub - fablabbcn/smartcitizen-enclosures: WIP Enclosures for the new Smart Citizen 1.5 contains two designs for outdoor enclosures.
HDPE milled components, a sheet metal support and commercial parts (PMMA-Acrylic pipe)
Mixed solution with 3D printed components and commercial parts (PMMA-Acrylic pipe)
inventing own cases is usually a lost cause with the tools a home-gamer has to work with. atleast if you want proper waterproofing: you will not get the precision necessary or have the tooling to make combinations from different materials tight (enough)
since some people still believe one could just ‘make the electronic not get wet’ and thats enough - nope. not by far.
thats a guranteed fail in european weather (voltage and humidity = corrosion, no direct water necessary)
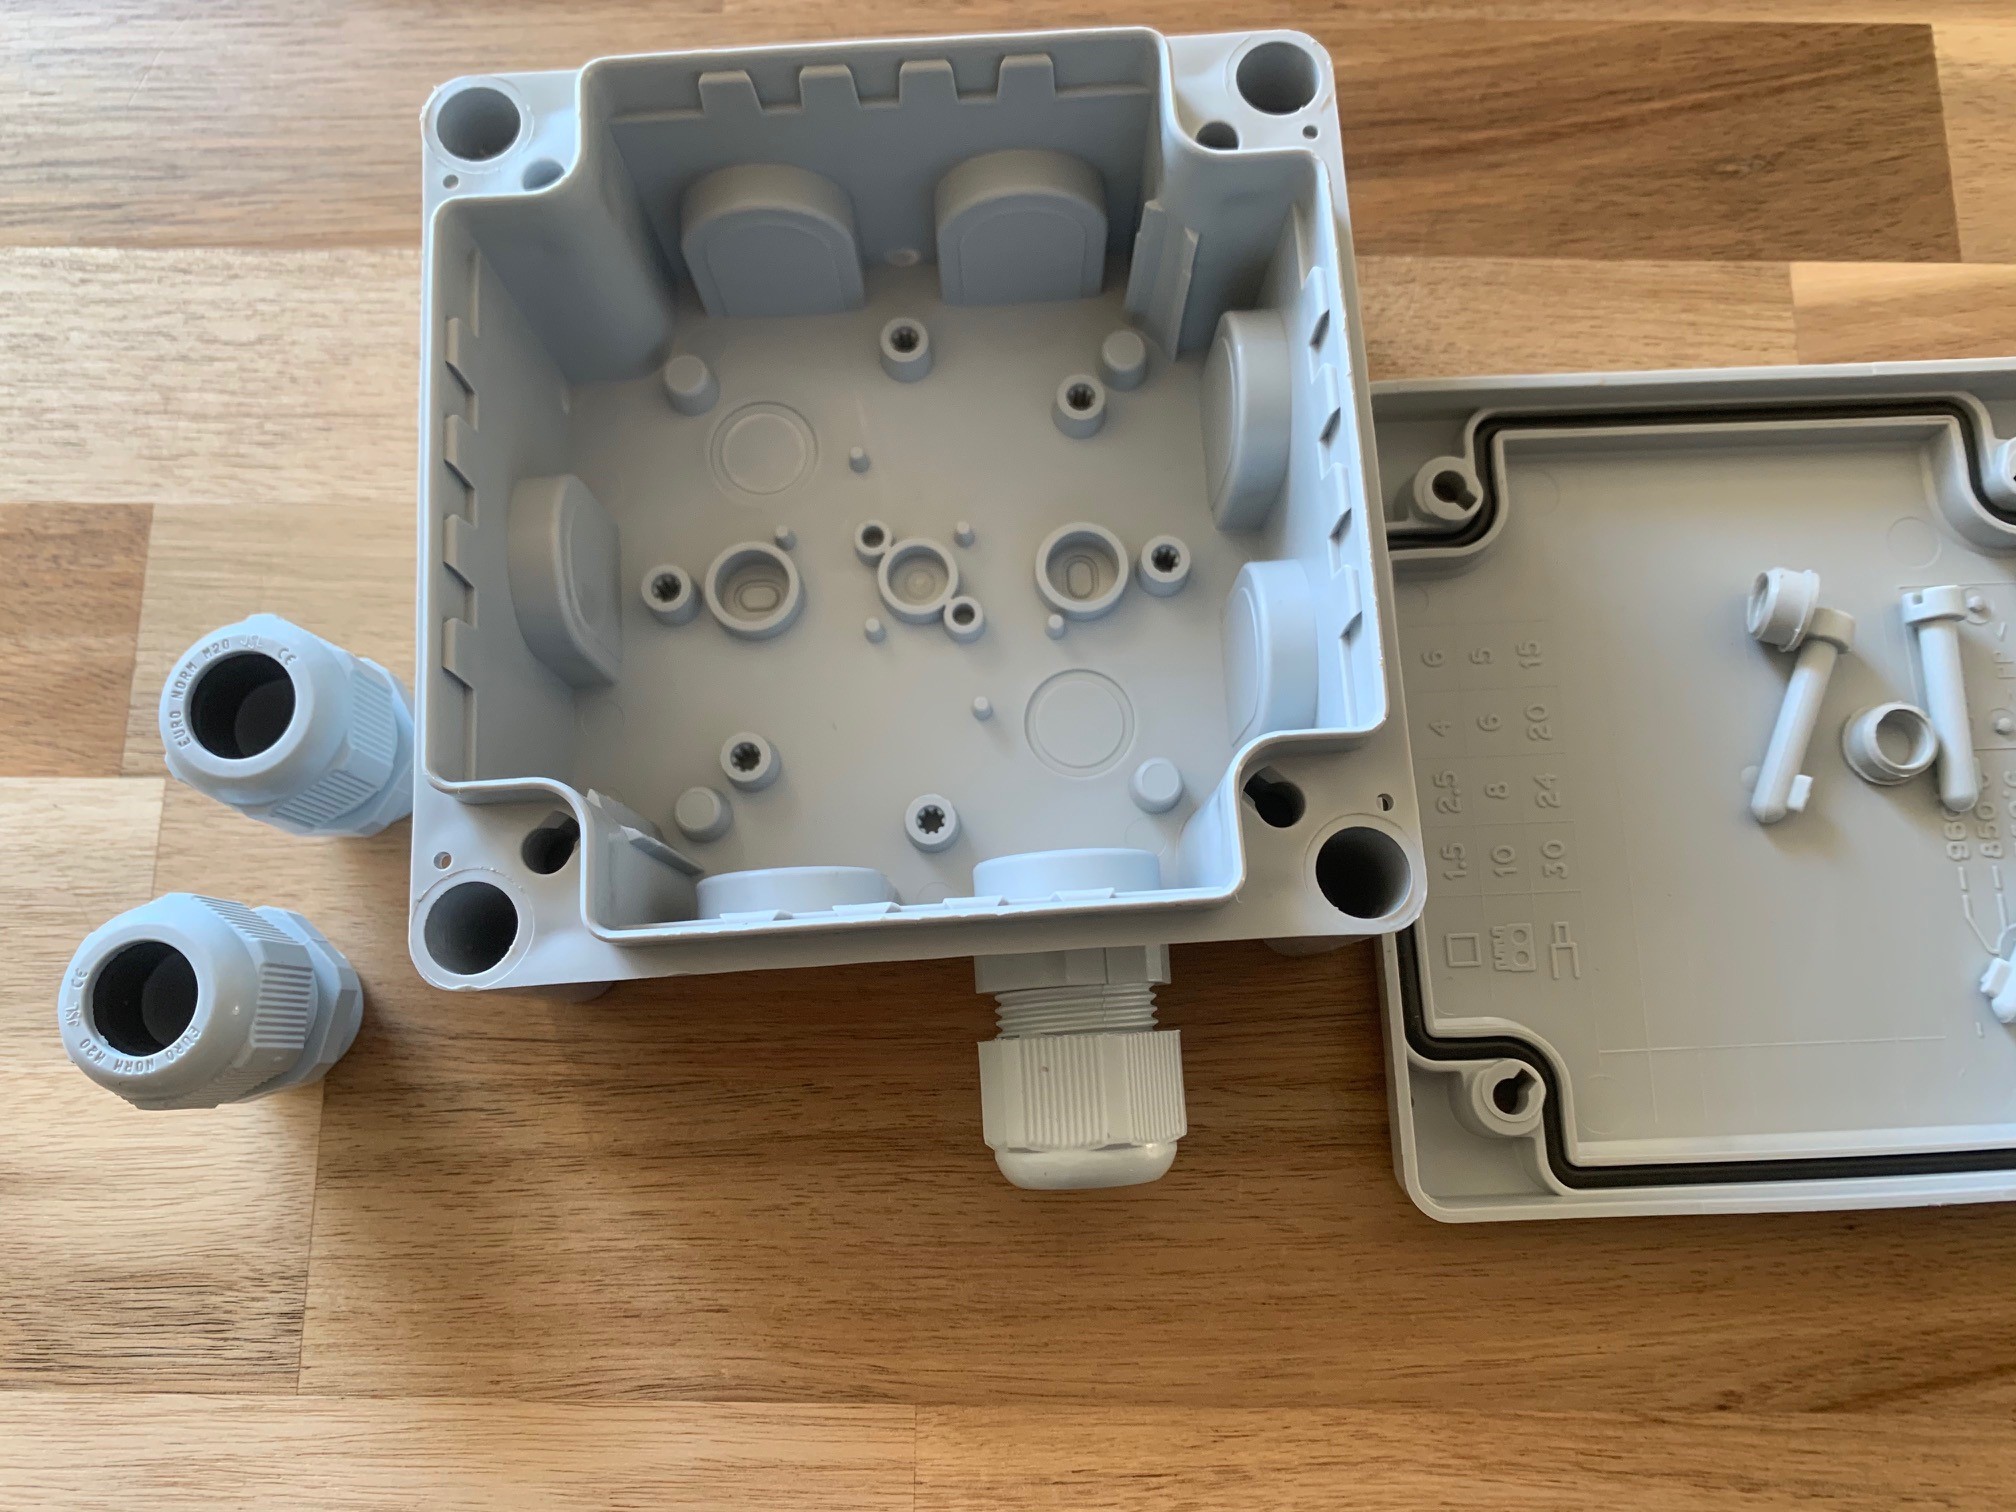
the solution is really simple: buy a (not necessarily expensive) proper water and airtight case. (something with a rubber seal and IP6…)
use proper cable glands with seals. if you are near the coast use neoprene seals instead of rubber (handles salty air/water better)
you MUST use a pressure equalisation element ‘druckausgleichselement’ - this is a small membrane with lets air through but not moisture. without it your case may seem tight but it will ‘pump’ in moisture quite fast with temperature swings (day/night etc)
some (extreme) example from bopla (case manufacturer) Warum ist ein Druckausgleichselement so wichtig? | Bopla Gehäuse Systeme GmbH | DE-EN - YouTube
all these parts are not expensive (glands and the pressure relieve cost single digit euros) but worth it when your electronics looks like on day1 even after years. usually the plastic case itself is biggest expense.
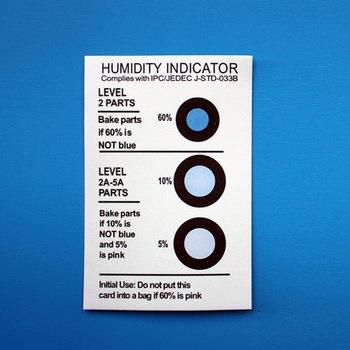
also…try to have all ‘connector holes’ on one side, and make that the bottom. for good measure one could even throw in a few silica-gel bags and some indicators like we get when shopping moisture sensitive parts
3 Likes
Auch wenn schon etwas älter, da ich gerade noch eine gekauft habe:
EAN 8711306664774
passt z. B. ein Pi Zero mit SDS011 prima rein
1 Like
Hi John, welcome!
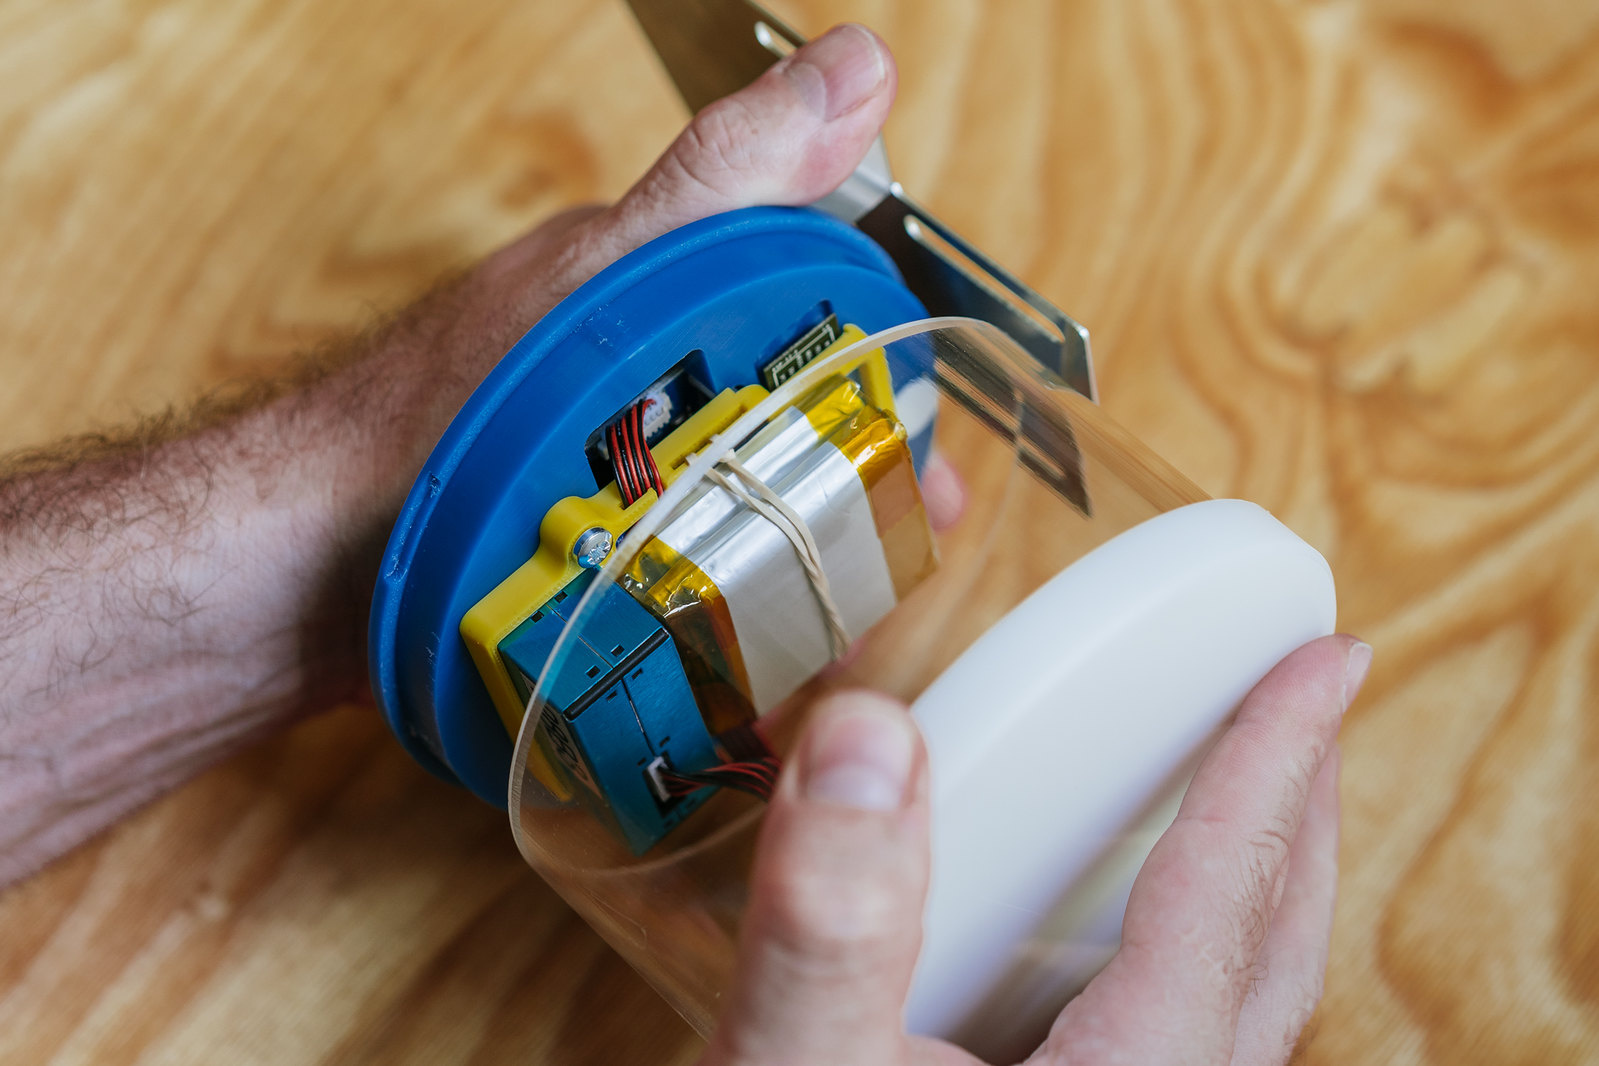
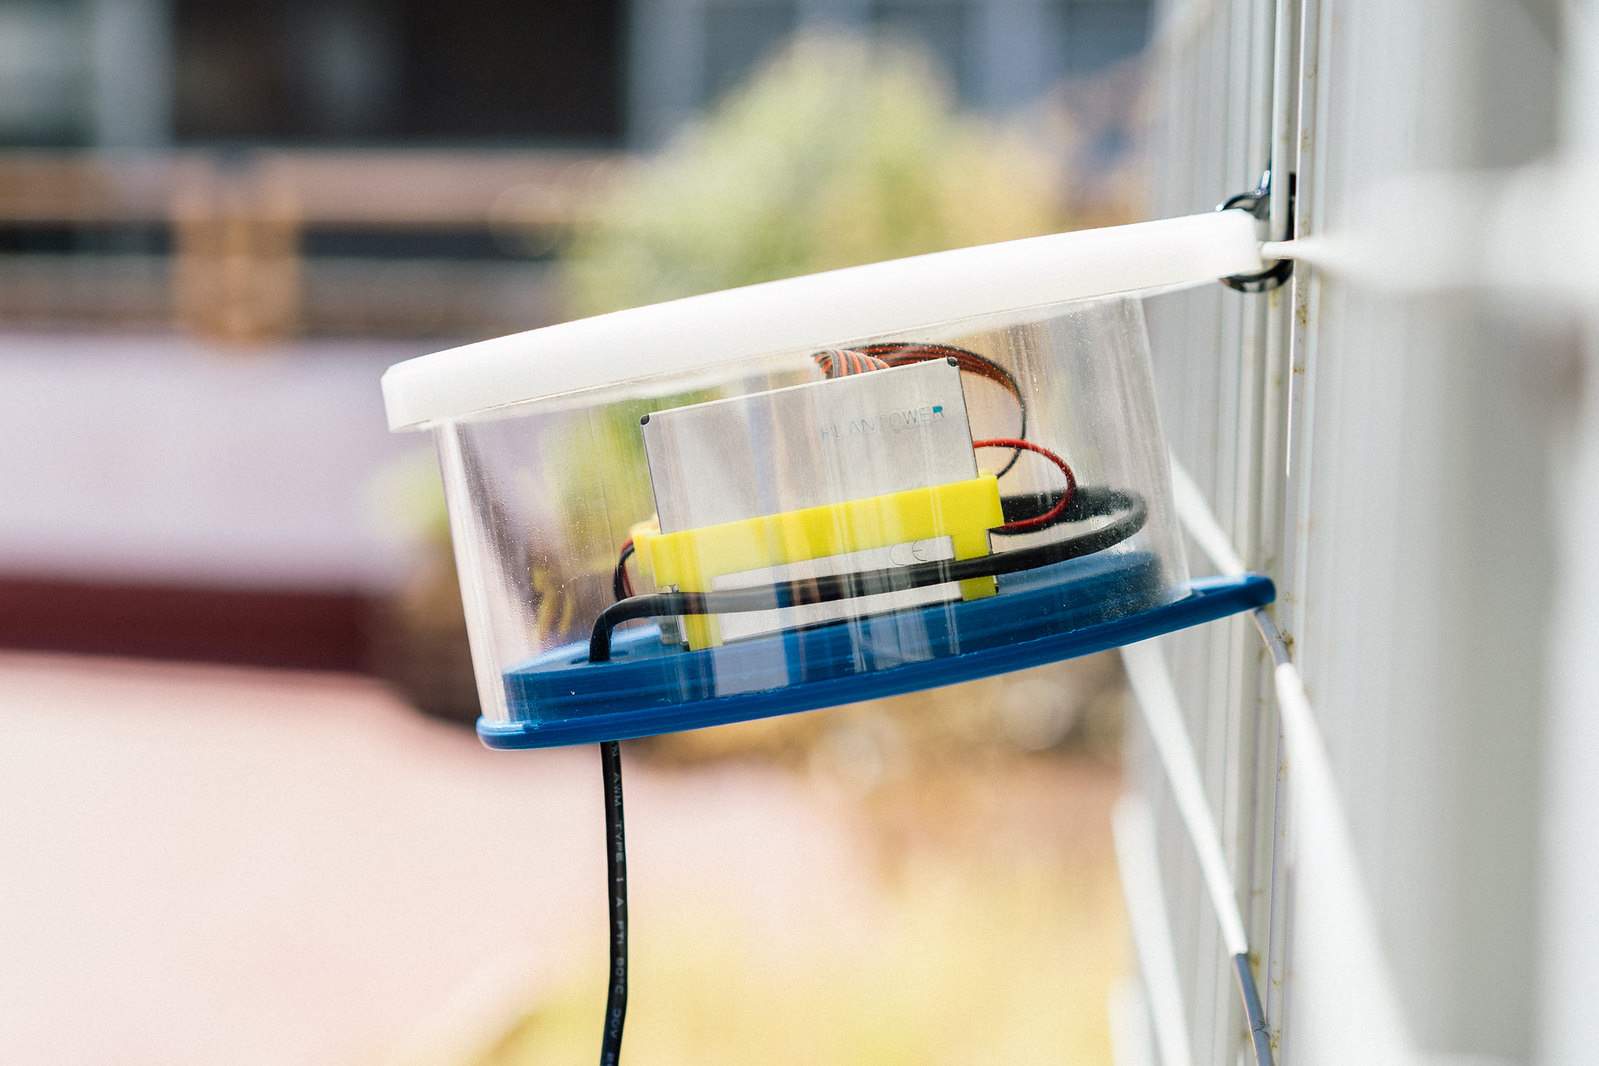
I like your use of a waste pipe as case. Has this already spent some time outside?
I guess the bracket for the wood panel is something printed?
1 Like
Hi Markus
Yes, it’s been outside since December. However I took the idea from watching Andreas Spiess’ youtube videos.
I’ve 3d printed the bracket in the bottom stop, also a battery bracket on the reverse side and a small enclosure for microphone and SHT35 that goes in the hive (it has little legs so it can be positions on top of the frames over the bee cluster. Two 3500mAh Li-ion batteries which last a month before needing a recharge (audio samples 30 seconds every twenty minutes during daylight, every 2 hours during darkness.
Thanks for the interest!
regards
John
1 Like
Oh yes, this guy is a source of quite a lot of good ideas! ![]()
What did you did for the cable exits? And anything about managing humidity?
I think he would be very pleased to hear that. Are you a subscriber to his channel too?
I’m using RJ45 jacks and cat 5 network cable [8 wires was right for the sensors], I just ran the cable through a rubber seal set into a drilled hole in the base. It hasn’t got wet feet yet!
Working on a PCB for it…if for nothing else it’ll look more professional than a perf board and loads of jumper wires ![]()
Yes and my only patreon on Youtube. I really enjoy how he thinks and presents his work.
Good luck with the PCB. You should present that here, too. There are some qualified people here (not me! ![]() )
)