I did some research in the direction of cheap IR grid sensors or “cameras” to detect the broad nest or winter cluster as alive. So the goal should be a cheap solution and not a sensor in the category of a professional Flir cam. I found the
Adafruit AMG8833 IR Thermal Camera Breakout
with 8 x 8 sensors (aka resolution), so you have 64 data points finally.
I think you can not mount it in a hive, so you would have too less distance to the object. On the other side measuring from outside would leed to less accuracy. You have isolating wood and an accuracy of ± 2.5° C. So I think it will only work with low environmental temperature und a high nest temperature in contrast.
Hallo Clemens,
ich habe etwas Erfahrung mit einem ähnlichen Sensor von Heimann gesammelt (32x32 Pixel). Für grobe Messungen sind die Dinger ganz ok problematisch ist die Spannungsversorgung(grob 1mV Spannungsänderung --> 1K Sensorsignaländerung) und die Temperatur des Sensors (hier hab ich die Werte nicht im Kopf). Hier kommt es schnell zu großen Abweichungen. Den Panasonic Sensor hatte ich allerdings noch nicht in der Hand und kann nichts zu dem sagen er liegt preislich aber in der gleichen Liga. Ich befürchte allerdings, dass er sich ähnlich verhält.
Thanks for this great ressources! $ 40 for the 8 x 8 AMG8833 vs. $ 60 for the 32 x 24 MLX90640 with a higher precision (±2.5° C vs. ±1.5° C) and the ability to measure minus degrees up to -40 sounds reasonable to choose the MLX90640.
The MLX90640 breakout is avialable in two flavors with 55° FOV (Field Of View) and 110° FOV
I did some calculations with this Öffnungswinkel berechnen website where you can choos the distance camera – object (Arbeitsabstand) and the size of the objekt (Sichtbereich / Objektgröße)
Lets say we have two different hive types a Top Bar Hive with 120 cm lenght and a Dadant broad box with 60 cm (all rounded).
distance cam – object
objekt size
FOV
1150 mm
1200 mm
~55°
600 mm
600 mm
~55°
400 mm
1200 mm
~110°
200 mm
600 mm
~110°
So the 55° would be good for “normal” hives like DN / Zander or Dadant and the 110° angle version better for TBHs.
Each PureThermal 2 ships pre-configured to operate as a plug-and-play UVC 1.0 USB thermal webcam that will work with a standard webcam and video apps on all major platforms.
Beside the price of $ 240 vs. $ 60 ;-) interfacing with the FLIR Lepton would be easy from a Linux system.
I have seen that the Adafruit AMG8833 has a build in thermistor. Don’t know if it is used for auto calibration. @caro mentioned also some experiments a time ago where she had to use an external additional thermometer to adjust IR readings.
I have tried to find a reseller in Europe but did not find any. The MLX90640 breakout is a SparcX product without guarantee and support. I don’t think it’s possible to sell products in Germany without any guarantee. So this may be also a reason for difficults getting this product.
The breakout is no rocket science. So in case we should count on this sensor a custom PCB would be possible.
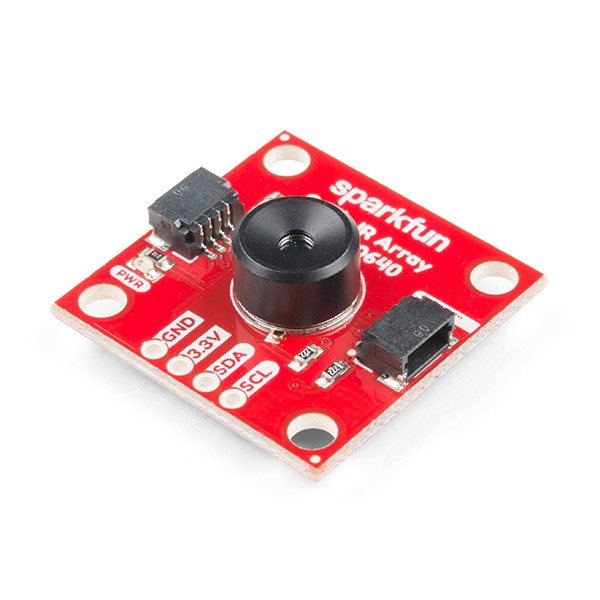
I bought now 2 Sparkfun sensors direct from the States for around $ 90 each with shipping and taxes.
Pimoroni has a breakout in an own variant too (currently out of stock), but disregarding UK is still EU, pimoroni only wants Great British Pound Sterling, no EUR… Interestingly, the German Pimoroni shop (formerly Tinkersoup) does not list this product; at least here.
Also Watterott and Sander import Sparkfun stuff not listed in their shop on request, and they sell to consumers.
I was too fast with my order, I got a notification from Pimoroni right now that the module is in the UK shop available again - for 55 respectively 60 EUR(! :-)
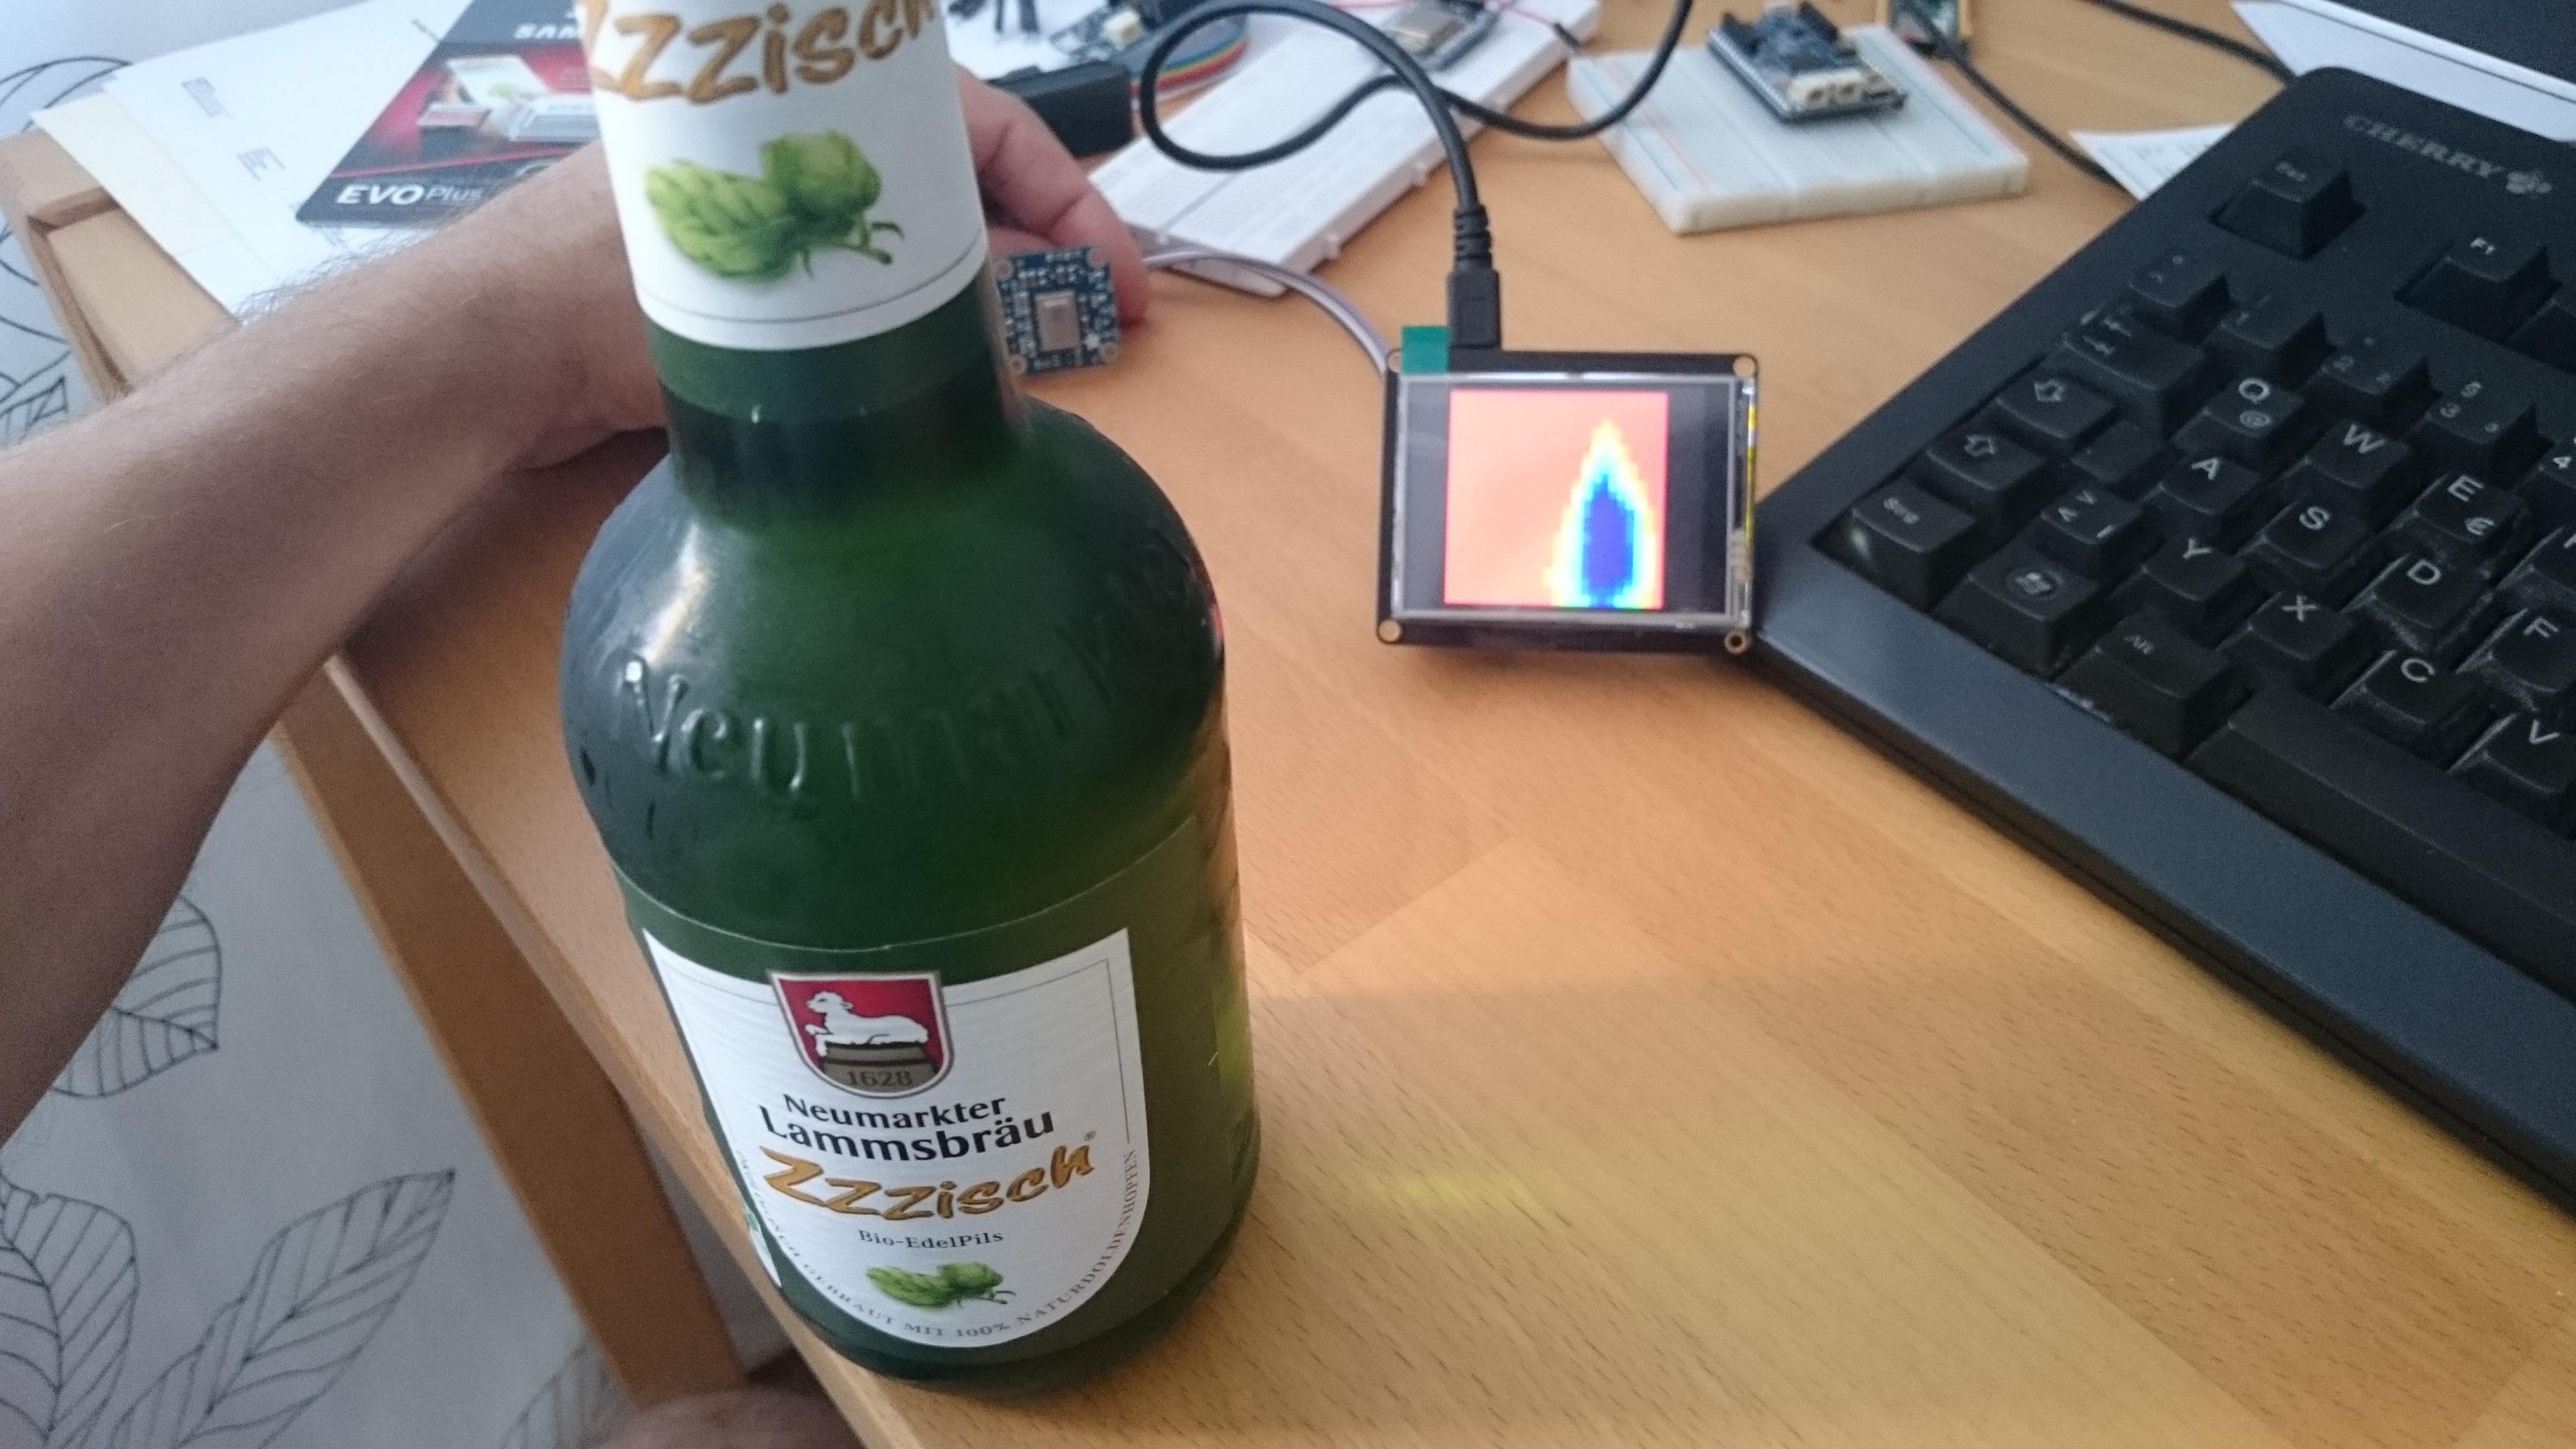
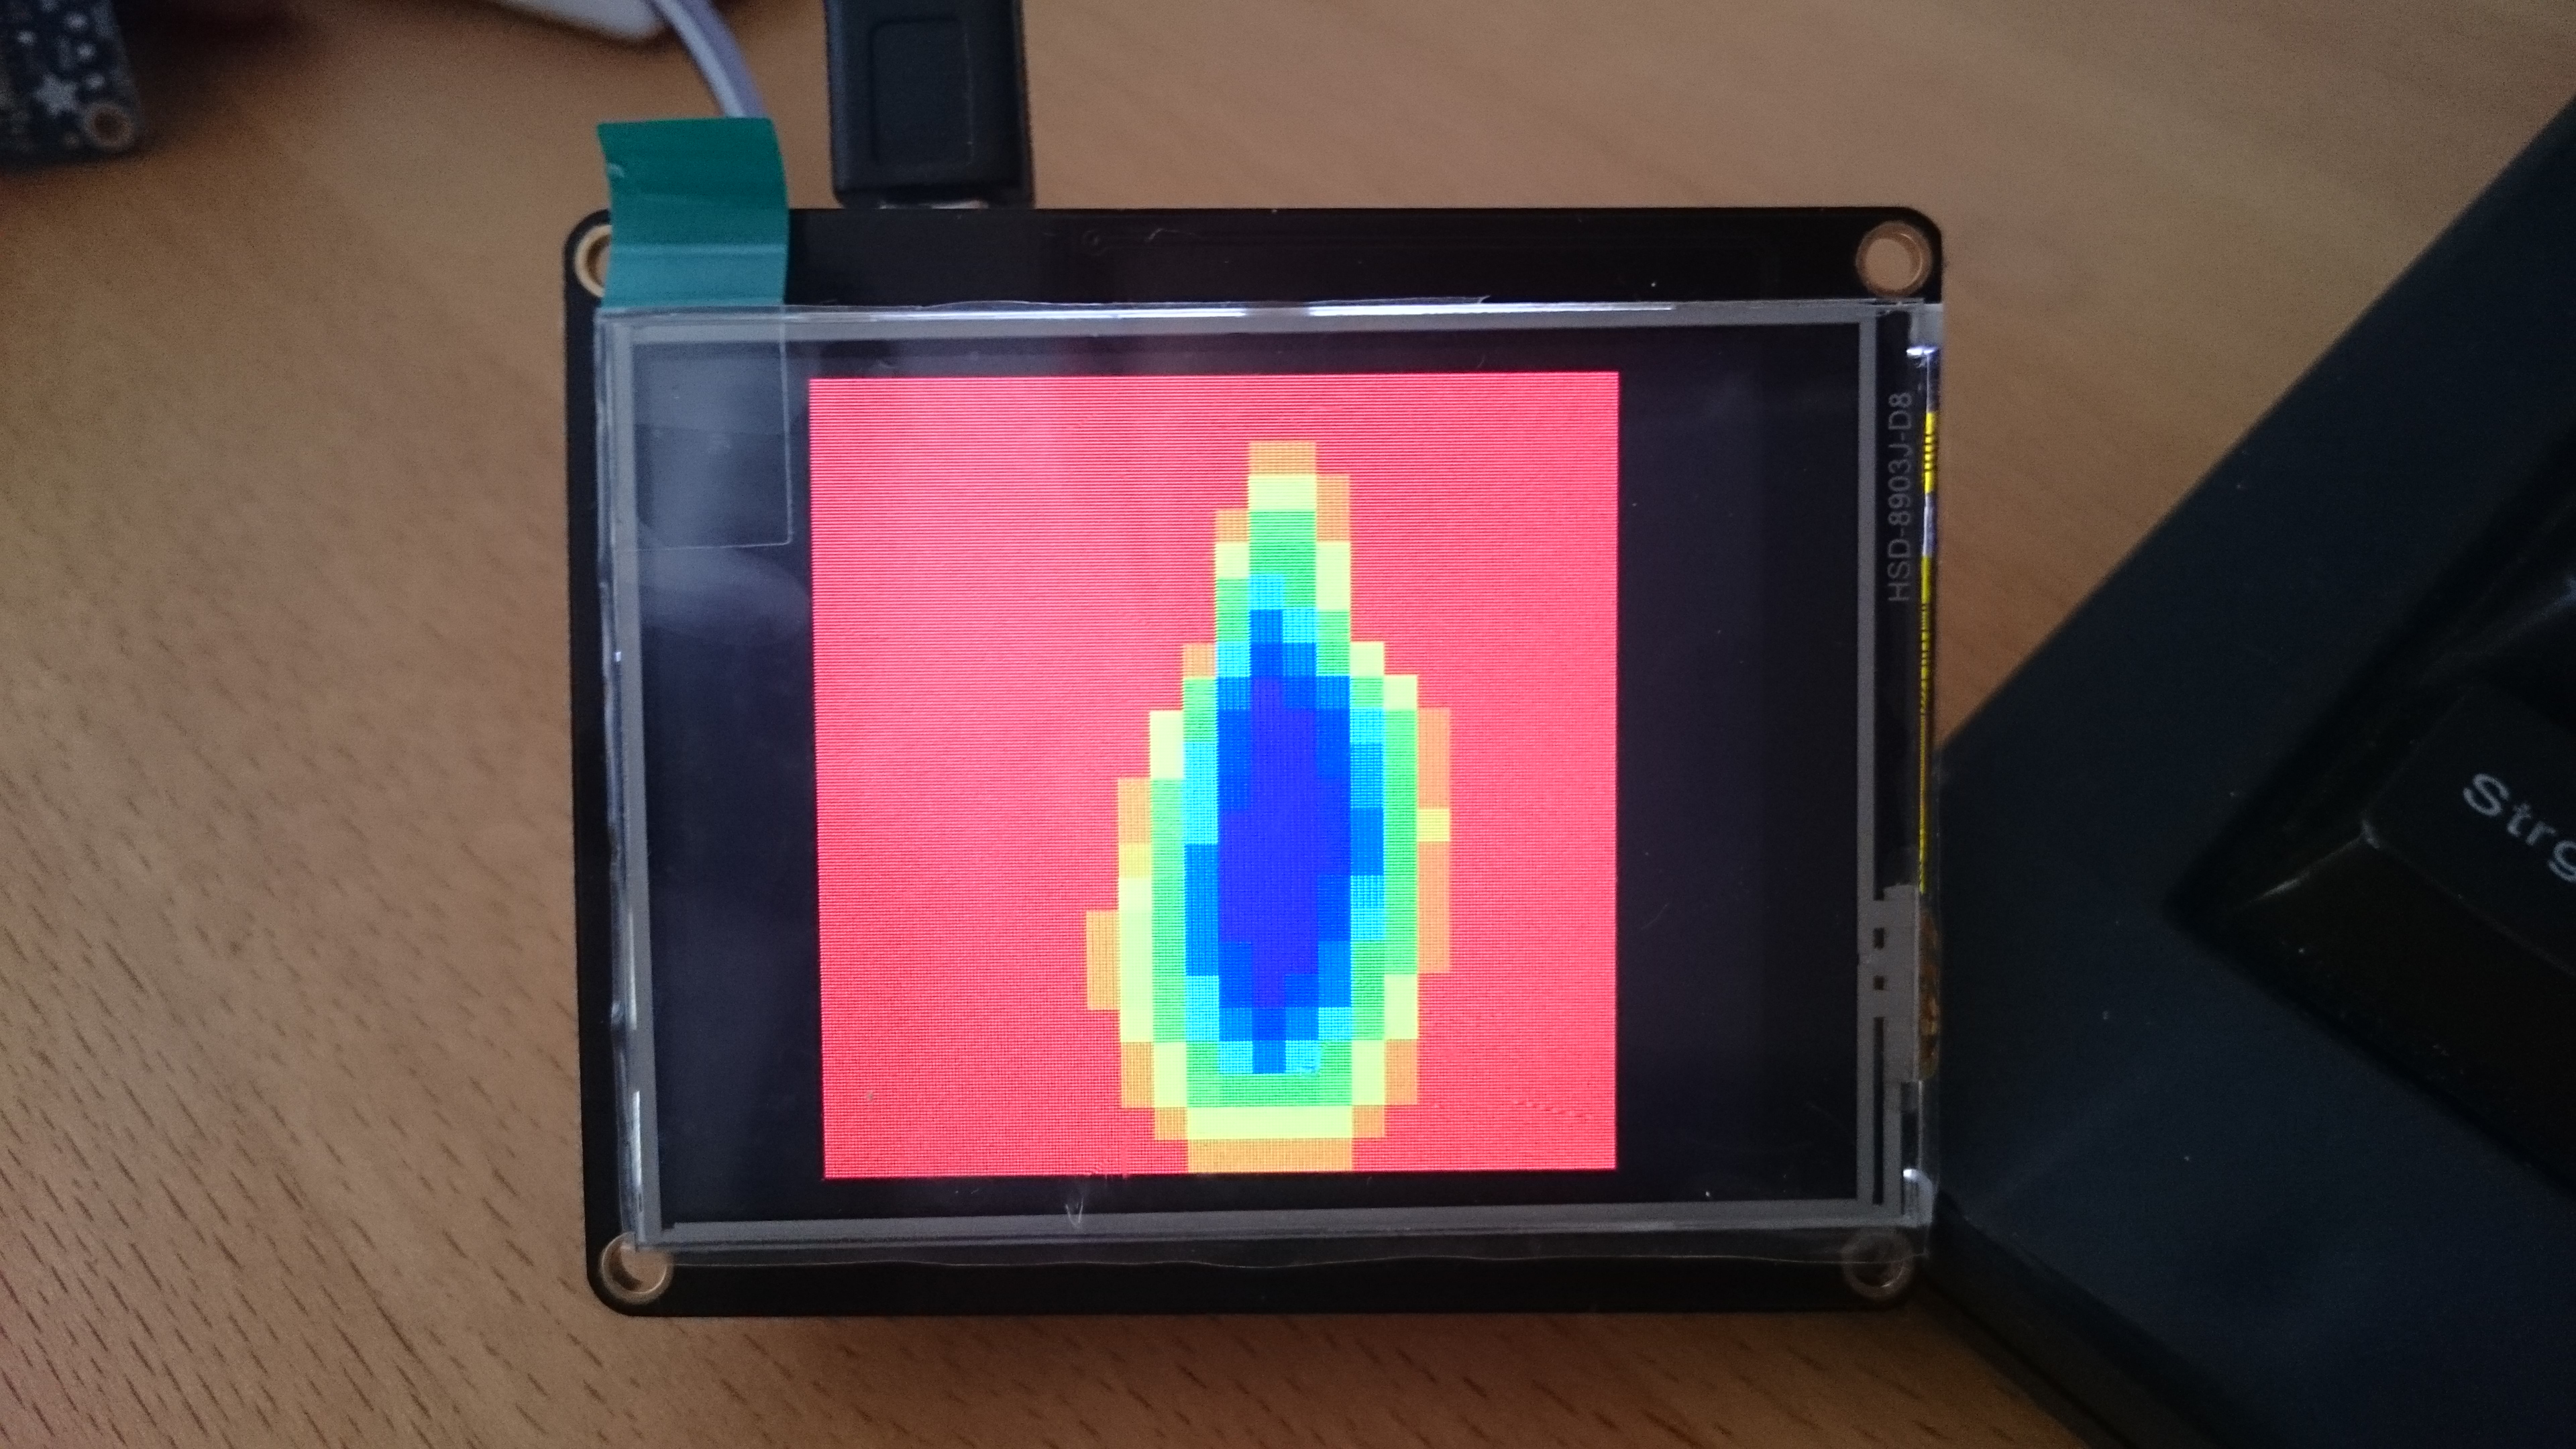
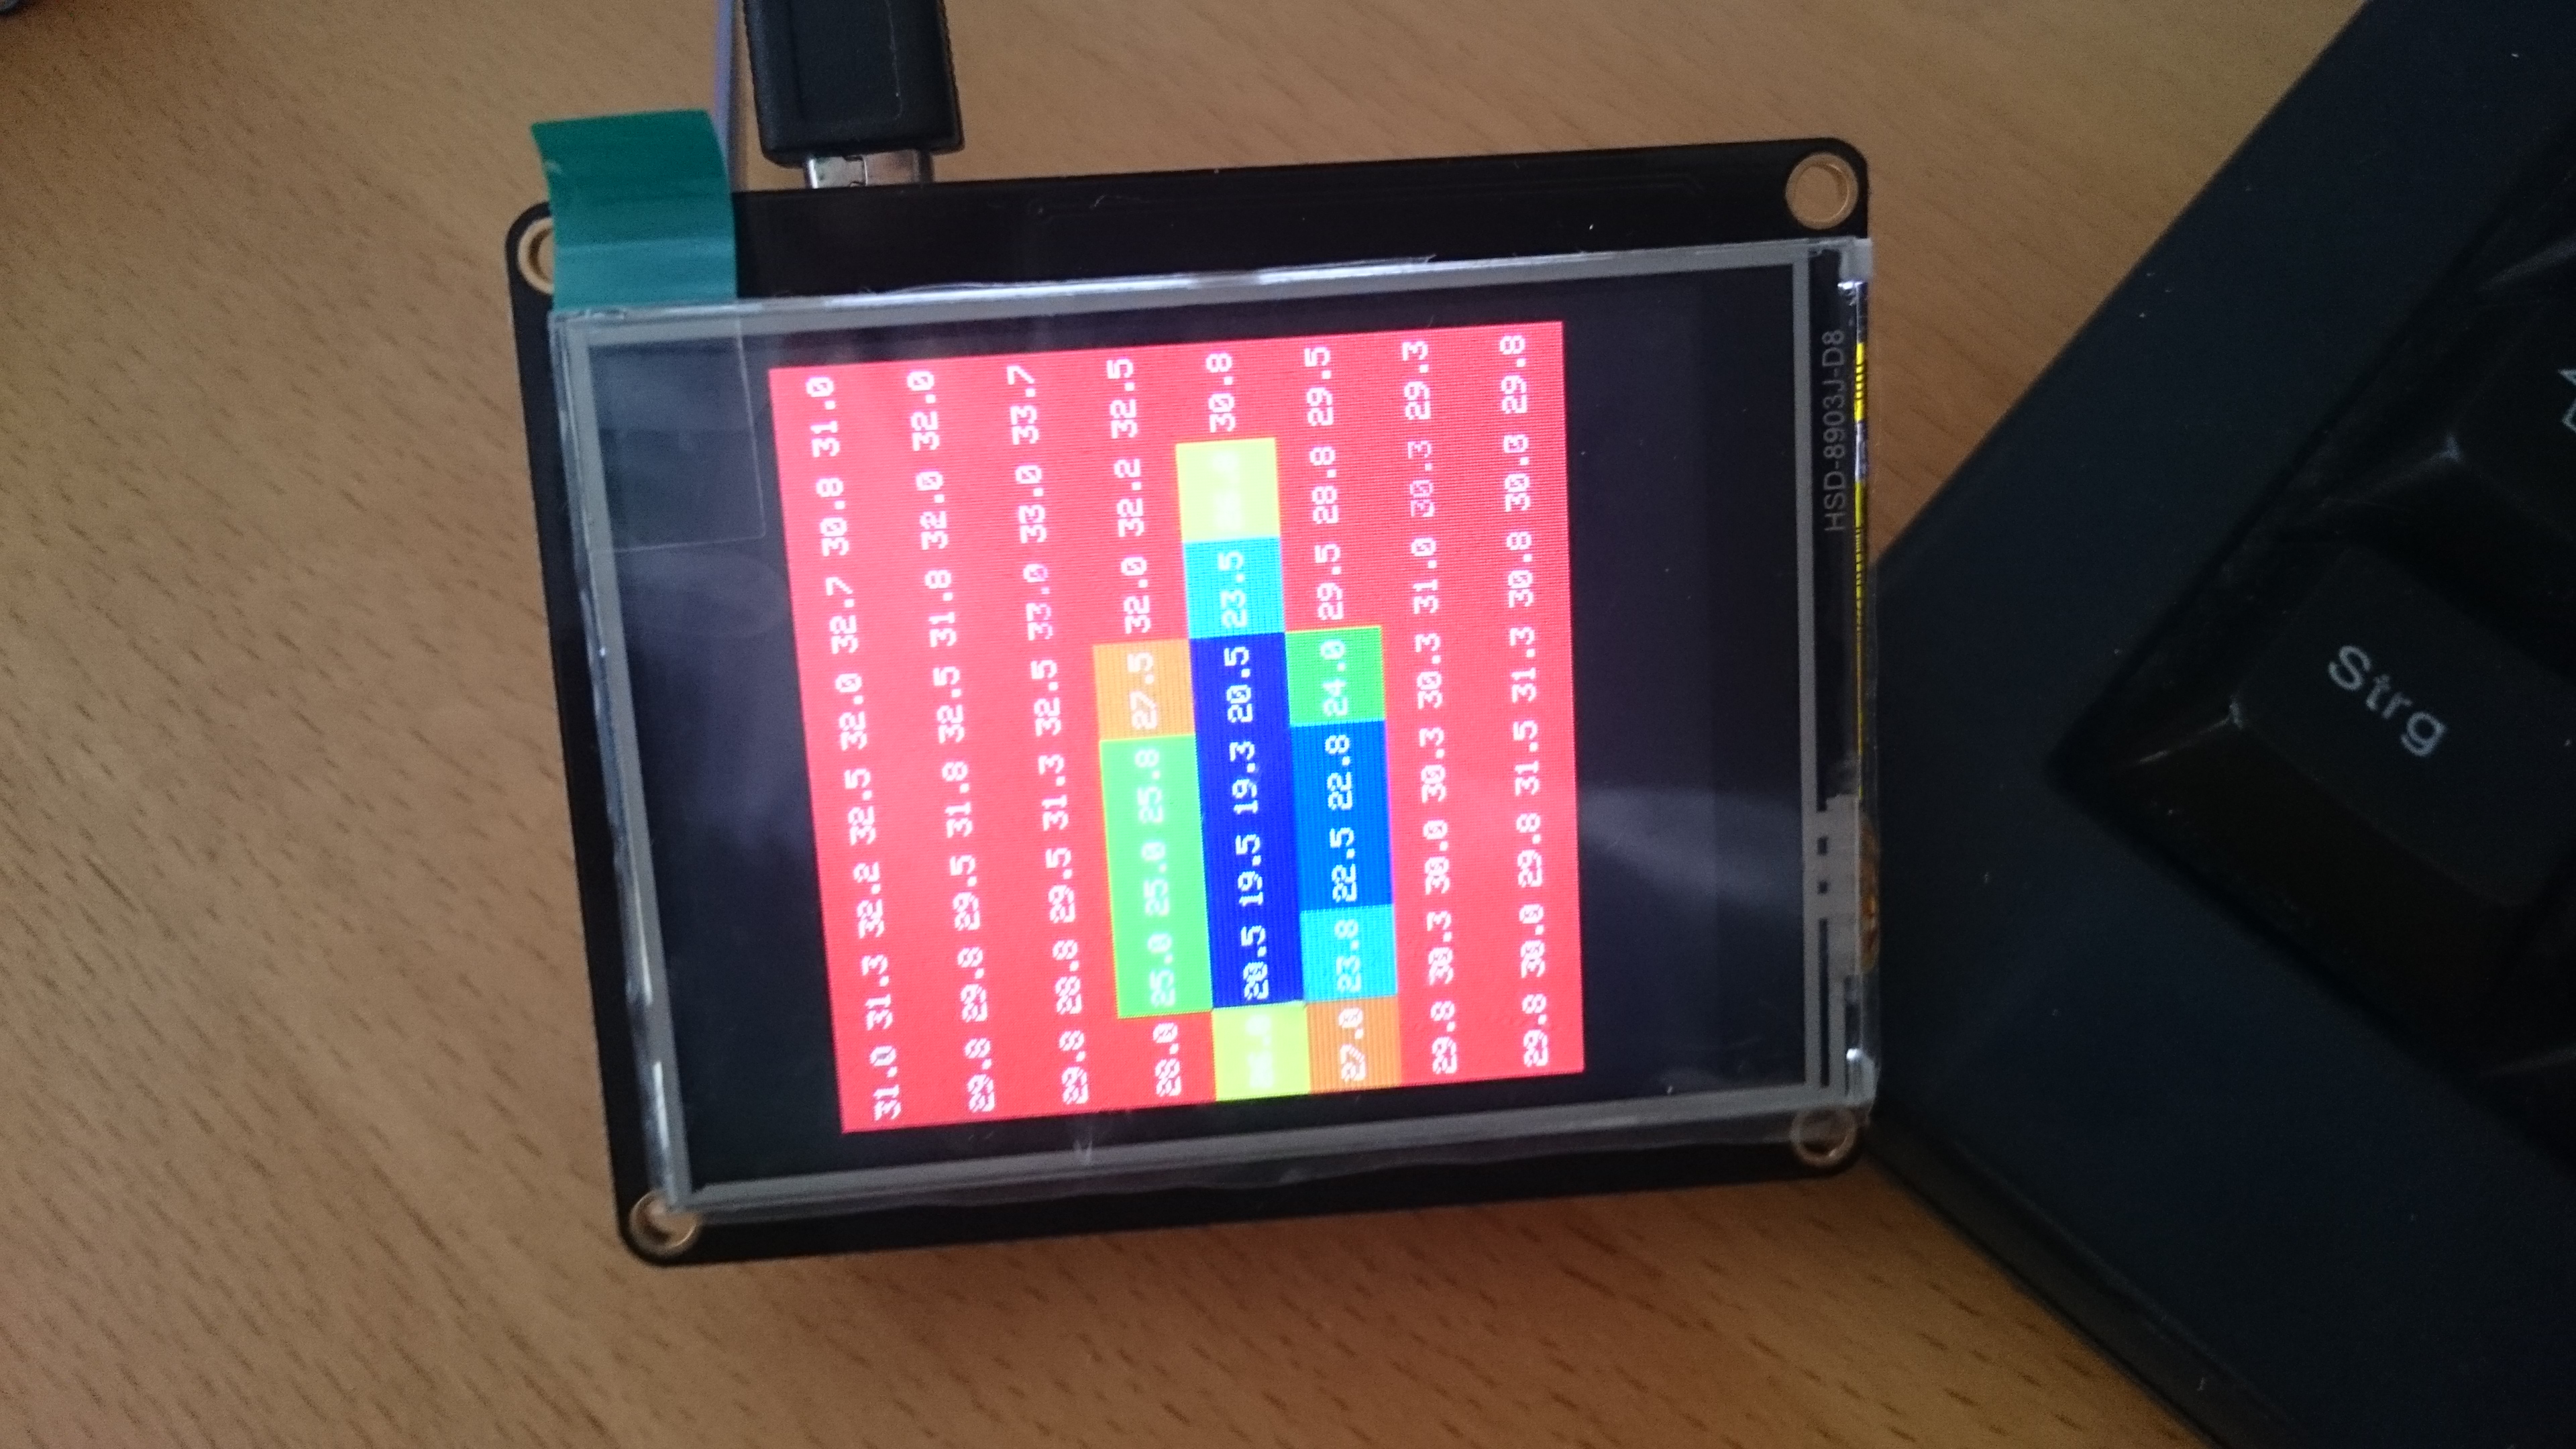
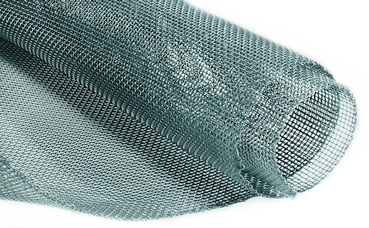
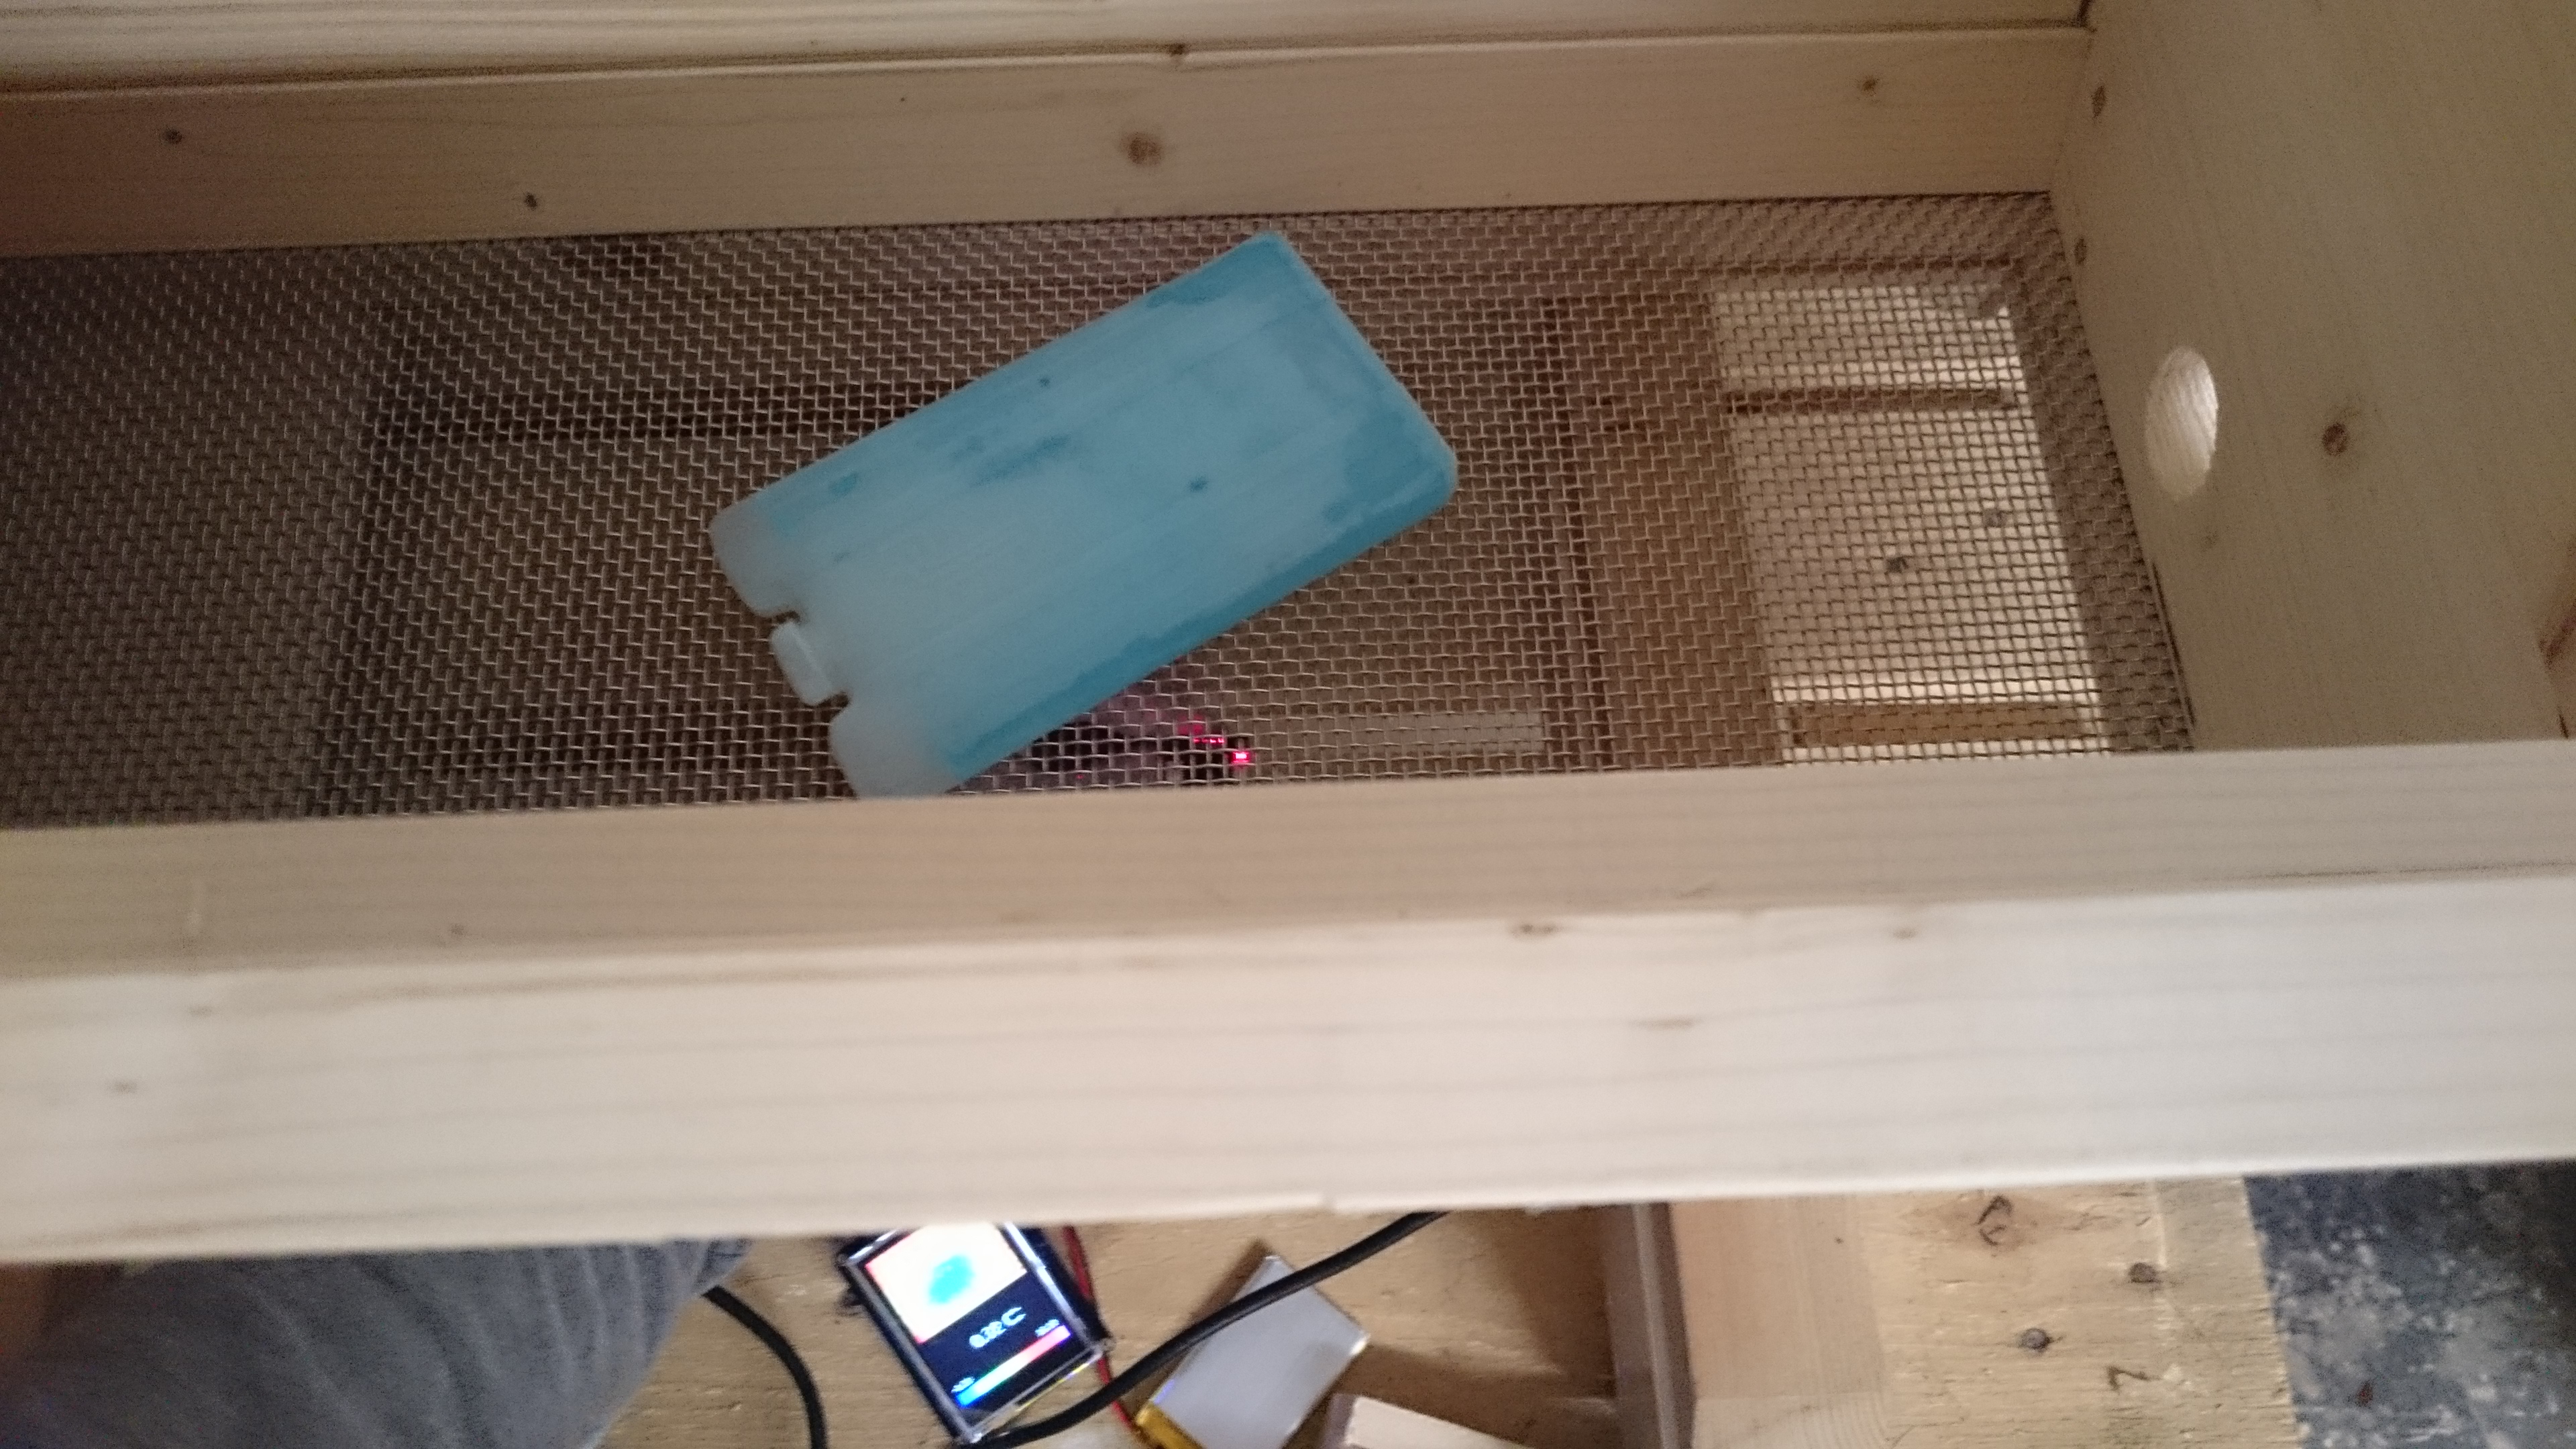
I took the Panasonic Sensor to my bees at the weekend. It was possible to measure through the floor’s wire mesh and i could detect areas with around 30° C vs. 25° C.
It was a stainless steel mesh like this one (and not a plastic mesh):
I am interested in taking photographs of bee’s as they leave and enter the hive. To this end I have been looking at using various sensors to detect bee’s when they are in the cameras ‘in focus’ plane. I am wondering whether anyone has used this sensor to detect individual bee’s. Using two sensors I can detect whether the bee is the correct distance for the camera to take an in focus photograph.
Andreas Spiess hat sich genau “unsere” Sensoren vorgenommen und den AMG8833 bzw. MLX90640 mit dem (deutlich teureren) Flir One-Smartphone-Aufsatz verglichen.
Der Sensor mit 110 ° FOV ist optimal platziert, wenn er 12 cm nach dem Fuß montiert wird. Er deckt dann den Bereich von Flugloch bis ca. 36 cm nach hinten an. Das sind etwa 11 Wabengassen.
Wenn man mit der Kamera von unten durch den Gitterboden schaut werden da auch Wachskrümel und alles runterfallen, was man sonst auf der Windelt hat. Auch der Schutz vor Regen ist notwendig,
Insbesondere beim Melexis-Sensor, da die Erhöhung um die optische Linse herum wie ein Trichter auch noch den Dreck im Umfeld einfängt, und dann alles auf dem tiefsten Punkt, genau der Linse, liegen bleibt.
Ich habe ein paar Sachen als Schutz probiert, Glas, Plexiglas, das war alles suboptimal. Sehr heiße / kalte Quellen (z.B. Kerzenflamme) können zwar manchmal noch detektiert werden, bei unseren erwarteten Differenzen von ggf. nur ein paar Grad würde der Wetterschutz aber alles fressen.
Daher habe ich bei Melexis direkt angefragt, welches Material sie als Schutz empfehlen:
As water absorbs FIR radiation, the sensor will not work with water on the lens or on any window in front of it.
A cheap material is HDPE but it has to be a thin sheet which will offer little protection. And it is not totally transparent and the performance of the sensor will be reduced. You can compensate slightly by changing the emissivity factor in the calculations.
Zu HDPE (High Density Polyethylen, oder Hart-Polyethylen) findet man einiges im Netz, u.a., dass Stretch-Folien (manche?, alle? ) daraus bestehen.
Wenn man das als “Plastik” / Folie mit ein paar 1/10 mm bekommt und dann als gewölbte Ebene über dem Sensor fixiert wäre das eine gute und günstige Lösung.
Mit der Folie ist ja schön - aber das Teil sollte keine Sonne abbekommen. Und auch als mechanischen Schutz halte ich einen shutter für angemessener, so machen die das bei den großen thermocams auch:
Wird das noch weiter verfolgt? Könnte da vielleicht ein Spiegel funktionieren? Dann ist die Kamera vertikal und der Spiegel 45°. Das wäre ja schon etwas einfacher sauber zu halten.